Key Things to Consider Before Joining a Yoga Teacher Training
Yoga Teacher Training is a life-changing journey that is demanding but also transforms you more deeply and meaningfully. There are key things to consider before joining a yoga teacher training session, which further help you pursue your teaching professionally. This article covers yoga teacher training considerations, benefits, its challenges and rewards, along with why to choose us (Himalayan Yoga Academy). Yoga Teacher Training is not only about learning various elements of Yoga but also about knowing Yoga within to evolve yourself better as a person or an individual physically, mentally, and spiritually.
Key Things to Consider Before Joining a Yoga Teacher Training
A. Your Personal Practice Level
Yoga Teacher Training is both physically and mentally demanding. It is more beneficial if you have familiarity with yoga practices. Your personal practice level helps to build a foundation in yoga asanas (postures), pranayama (breath work), and meditation. Most YTT programs accept all levels, so you just have a passion as a practitioner to learn and absorb the material.
B. The Yoga Style
Yoga styles are broad, with disciplines such as Hatha, Vinyasa, Ashtanga, Iyengar, Kundalini, and many more. Yoga practitioners must choose a program that matches their style of yoga the most. Make sure the selected training program aligns with your personal preferences and long-term goals as a teacher.
C. The Duration and Commitment
Yoga Teacher Training demands intense commitment as the duration ranges from 200 to 500 hours. So it may take several months to complete a training program. Remember that joining a training session is not just about attending classes, but also about self-study, homework, and practice teaching. Thus, to join a class, prepare yourself both physically and mentally to balance your work, family, and other responsibilities.
D. The Program Cost
Yoga Teacher Training program costs can be expensive, considering factors like course duration, location, amenities, travel, textbooks, materials, etc. It may range from a few hundred dollars to even cost a lot if the reputation of the Yoga institution is involved. Select the training program that best aligns with your interests and look for payment plans or scholarships if you wish to enroll in your desired institution. Overall, proper financial planning and preparation are essential to joining a class.
E. The Right Environment
The right training environment is very important as it creates an uplifting environment to focus deeply. Not only is it necessary to select experienced instructors and reputable institutions. But it is also necessary to But it is also necessary to But it is also necessary to make sure the training space is well-equipped and comfortable. The best way to select the right environment is to read verified past reviews and testimonials of the program that you are enrolled in.
F. Your Intentions and Long-Term Goals
Your intentions and long-term goals determine the fruitful outcome of the Yoga Teacher Training. Thus, it is best to have a clear intention that aligns with the right training program to get specialization for your career as a certified yoga teacher.
Benefits of Yoga Teacher Training (YTT)
A. Deep Understanding of Yoga
YTT deepened the understanding of Yoga through long hours of continuous practice. The knowledge of Yoga expands with an insightful understanding of the philosophy, anatomy, history, and spiritual aspects of yoga. It assists you to practice more precisely, ultimately resulting in benefiting both your body and mind.
B. Personal Growth and Transformation
YTT helps in personal growth and transformation, resulting in knowing oneself better and understanding the different aspects of Yoga in a better way. Yoga transforms both internally and externally through healing, developing self-awareness, and discovering your true potential.
C. Building a Like-Minded Community
YTT provides an opportunity to meet and build a like-minded community, attracting people from all aspects of life. The support, the connection, the motivation, along with the shared experiences of fellow participants throughout the training, provide a new sense of formation of a relationship.
D. Teaching Skills and Certification
YTT provides the teaching skills as well as a completion certificate to verify authenticity as a certified yoga instructor or teacher. The teaching skills you gain include organizing class sequences, providing adjustments, and clear communication with the students. It is your new path to lead your career in teaching yoga as a certified teacher.
E. Increased Mindfulness and Stress Relief
The long practice of Yoga builds up an ability to release stress and increase mindfulness. As a yoga teacher and as a student, the daily practice of yoga helps in leading a balanced and stress-free life with improved emotional balance, strong physical health, and mental clarity.
Also Read: Yoga Teacher Training in Nepal Courses
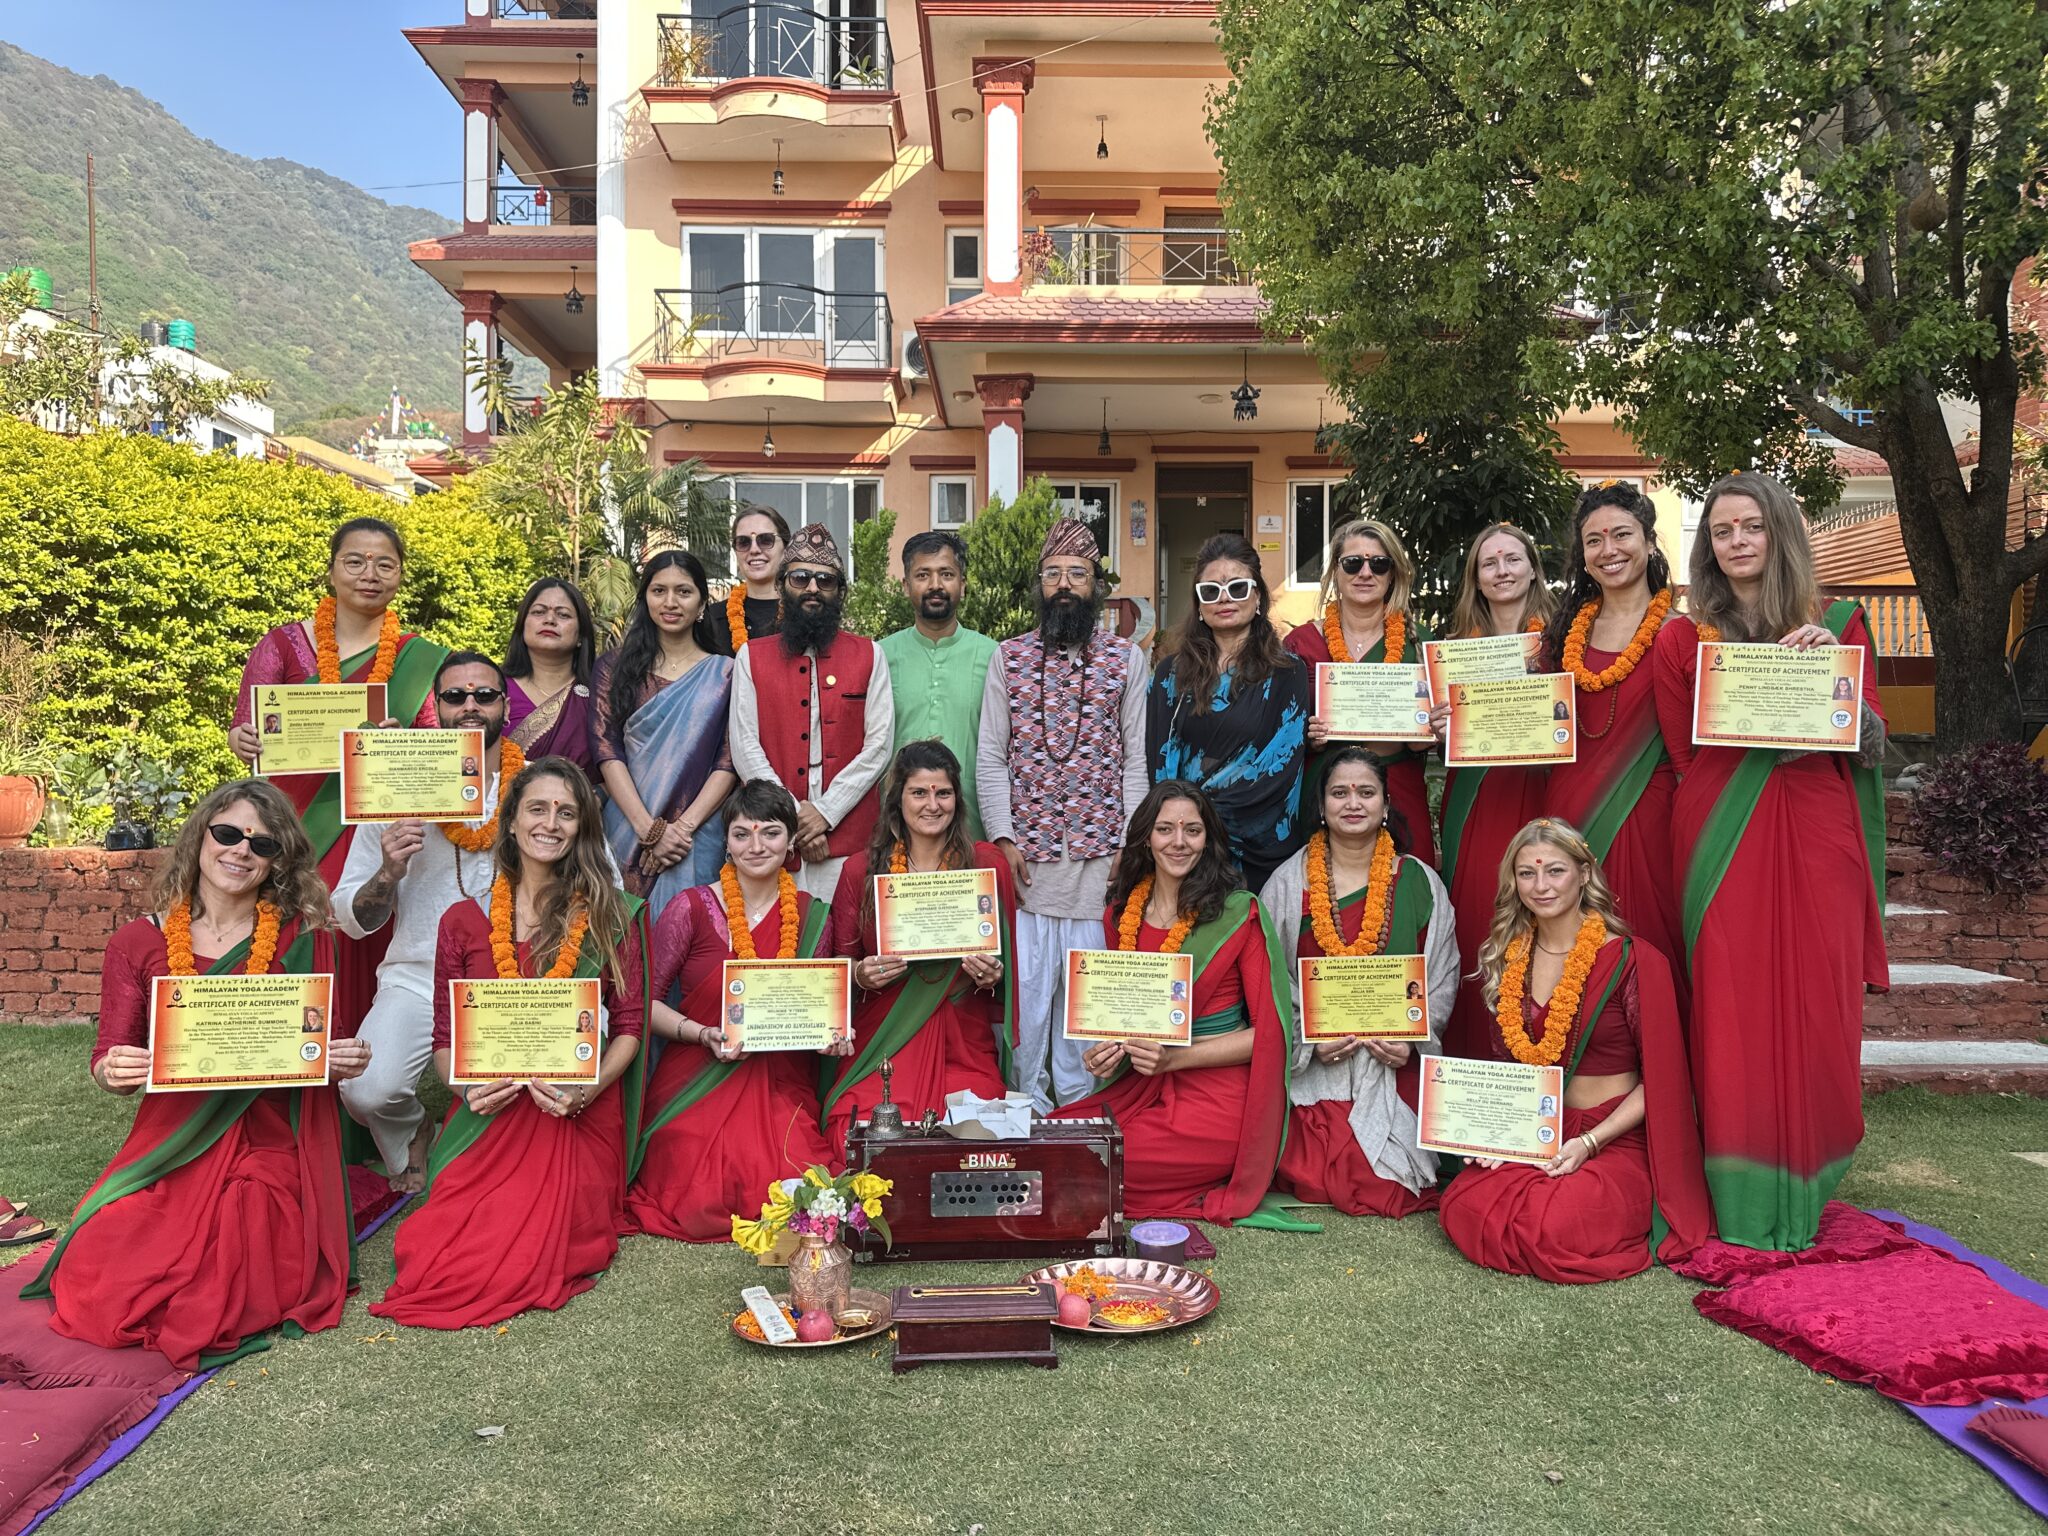
Why Choose Us (Himalaya Yoga Academy) for Your Yoga Teacher Training?
Himalaya Yoga Academy offers a comfortable environment and experience for aspiring yoga teachers. We have designed a program that aligns with both your personal goals and the quality of training you wish to receive. The reasons for choosing us for your Yoga Teacher Training are as follows:
Authenticity and Tradition
The authentic teachings of Yoga, with traditional yoga practices such as Hatha and Asthanga Yoga. Connect us between ancient yoga traditions and modern relevance.
Experienced and Passionate Teachers
The teachers in our academy are highly experienced, certified, and passionate about unique practicing techniques. Our teachers’ dedication and the ability to form a good relationship with practitioners help in building their students’ personal growth and professional development.
Comprehensive Curriculum
Our comprehensive curriculum for our Yoga Teacher Training offers a wide variety for our clients. They have a choice to select the right program that aligns with their preferences for Yoga practices.
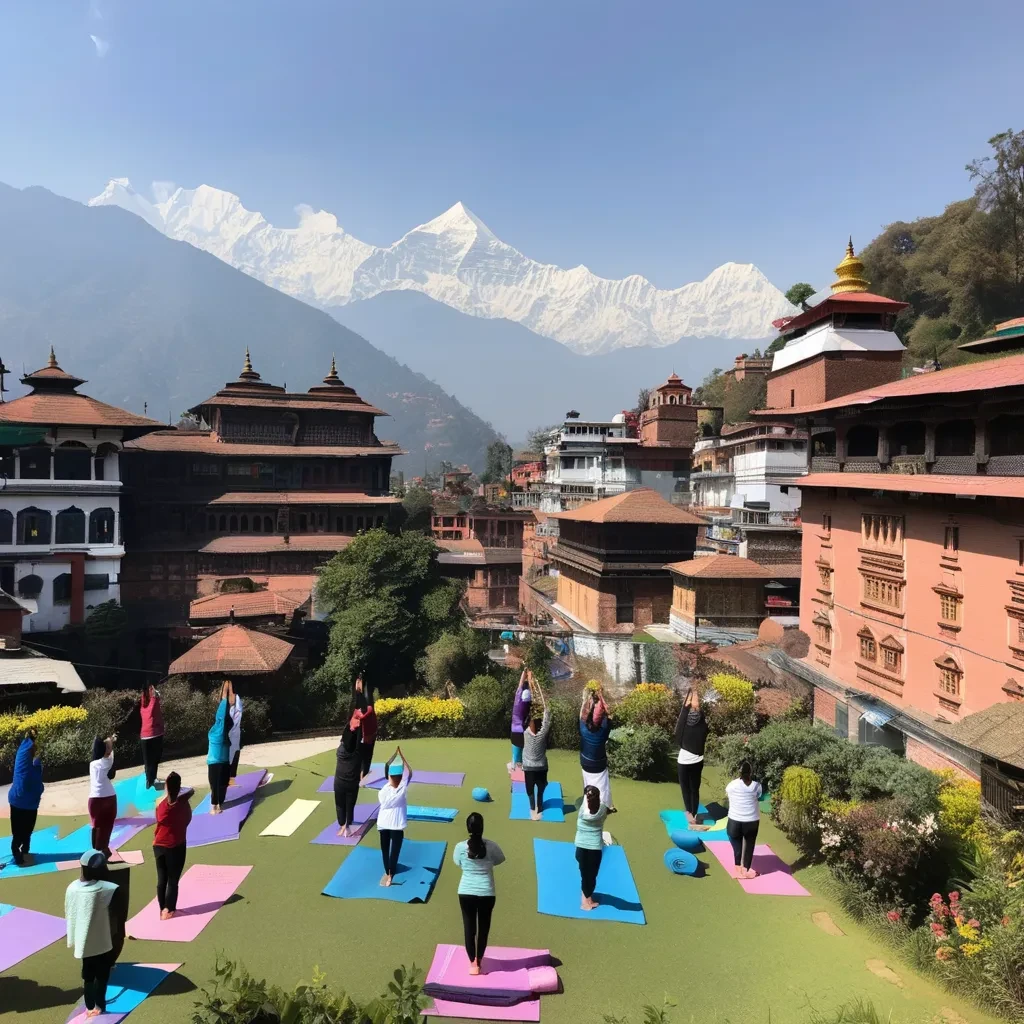
The Perfect Environment for Learning
Our Yoga Academy is situated in the beautiful vicinity of greenery, offering a peaceful environment for learning. The natural aura of the academy enhances the training experience and allows you to connect more deeply with the yoga practice.
Global Community and Support
We pride ourselves on building a supportive, international community of yoga students and teachers. The practitioners come from all over the world and build good bonds and friendships that further support their personal growth.
Certification and Career Support
You’ll receive a globally recognized certificate, i.e., Yoga Alliance, which is accredited to provide you with the credentials to pursue a successful yoga teaching career. We also provide career guidance and support, helping you navigate the next steps in your professional yoga teaching journey.
Affordable and Flexible Options
Our Yoga Teacher Training is accessible to several students with affordable courses and flexible payment plans to suit various budgets. Furthermore, our location offers affordable accommodation options for international students.
Conclusion
Yoga Teacher Training is a rewarding journey that is full of challenges and inspiration for a better transformation. Thus, before joining a Yoga Teacher Training, approach it with a clear mind and practical expectations. The provided key insights before joining a Yoga Teacher Training prove beneficial when taken with the correct approach for preparation to become a certified, skilled teacher. Yoga Teacher Training transforms your life in ways you never expected.
Written By: Anjali B
Combine Yoga and Sound Healing for Deep Relaxation
Yoga practice is slowly becoming an integral part of an individual for better physical health and mental clarity. Practicing Yoga is a boon which helps an individual to calm their mind, body, and soul. Yoga serves as a peaceful escape from their hectic schedule, bringing relaxation. Yoga is powerful on its own, but when combined with sound healing, it intensifies its benefits, promoting deep relaxation and inner balance. This blog will show you how to combine Yoga and Sound Healing for Deep Relaxation.
What is Sound healing?
Sound healing is an ancient therapeutic practice that uses sound frequencies to cure physical, emotional, or energetic imbalances. The vibrations from various instruments such as gongs, singing bowls, tuning forks, and drums are used for sound healing. The main purpose of sound healing is to restore balance within the body and mind.
Also Read: Understanding Sound Healing and Sound Baths
Why Combine Yoga and Sound Healing?
Yoga prepares the body and mind to be more approachable. Sound healing complements this by deepening relaxation, slowing brain waves, and enhancing the meditative state. Together, they:
- Reduce stress and anxiety
- Balance energy and chakras
- Improve sleep and emotional well-being
- Enhance mindfulness and spiritual connection

How to Combine Yoga and Sound Healing for Deep Relaxation?
A. Start with Gentle Movement or Restorative Yoga
Choose a slow-paced style like Yin Yoga, Restorative Yoga, and Hatha Yoga as these styles help calm the nervous system and prepare you to receive sound vibrations more fully.
Yin Yoga: long-held poses target connective tissues.
Restorative Yoga: uses props to fully support the body.
Hatha Yoga: slow movements with breath awareness.
Quick Tip: Dim the lights, light a candle, and create a cozy, quiet space.
B. Incorporate Sound Throughout the Practice
You can add sound in various ways:
Live Instruments: Use singing bowls, chimes, or gongs during long holds or savasana.
Background Soundtracks: Play recorded sound baths or binaural beats during the session.
Vocal Toning/Chanting: Begin or end with “Om” or mantra chanting to activate throat chakra and vibration in the body.
Quick Tip: Place singing bowls near the body or on the mat for deeper resonance.
C. Synchronize Sound with Breath and Movement
During the yoga flow, you can:
Use soft chimes to signal transitions.
Match breathing exercises (pranayama) with tonal background sounds.
Use hand-held instruments (like rain sticks or ocean drums) during breath work or meditative stillness.
Also Try: Alternate nostril breathing (Nadi Shodhana) followed by tuning fork tones to clear energy channels.
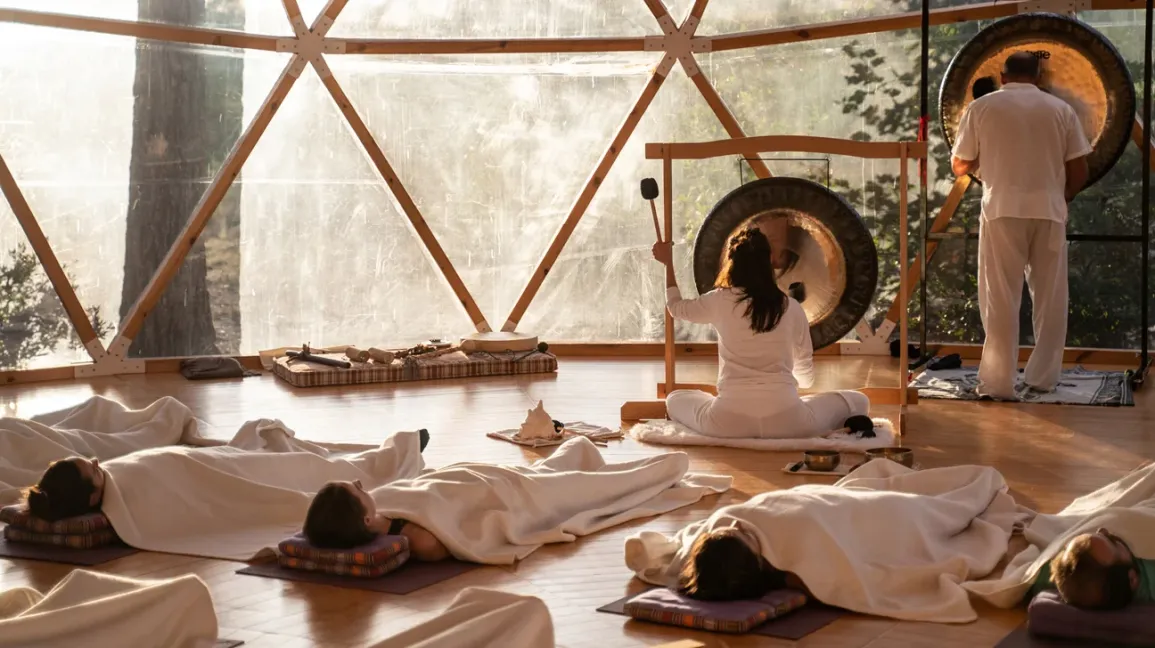
D. End with a Sound Bath in Savasana
This is the most powerful way to combine both practices:
Lie in Savasana (Corpse Pose) fully supported with blankets and cushions.
Use crystal bowls, gongs, or voice to create layered sound.
Let participants fully surrender into the vibrations for 10–20 minutes.
Note: Sound during savasana can induce theta brain waves, leading to deep healing and vivid inner awareness.
Benefits of Combining Yoga and Sound Healing
1. Deeper Relaxation
Sound slows down the mind, helping you enter a meditative state faster than yoga alone.
2. Heightened Body Awareness
Vibrations help you feel more connected to your body and breath, supporting mindful movement.
3. Energetic Balance
Different sounds resonate with different chakras, helping to clear blockages and enhance energetic flow.
4. Stress Reduction and Emotional Release
Both practices activate the parasympathetic nervous system, lowering cortisol and releasing held emotions.
5. Enhanced Spiritual Connection
Together, they open space for introspection, intuition, and inner peace.
Precautions and Considerations
Sound Sensitivity: People with anxiety or PTSD may feel overstimulated by certain instruments. Always start gently and check in.
Environment Matters: Choose a quiet, acoustically soft room to avoid harsh echoes.
Go Slow: Deep healing can bring up emotions. Practice integration after your sessions with journaling, grounding, or nature walks.
Conclusion
Combining yoga and sound healing is a deep therapeutic practice that offers deep relaxation through the power of vibration. The unison of body and sound allows an individual to connect with themselves and get to know them more deeply. So are you ready to experience it? Get ready, bring a yoga mat, a bowl (or a playlist), and surrender yourself to a quiet environment.
5 Easiest Standing Yoga Poses for Beginners
Yoga practice among individuals is blooming, which is a good indication. It shows that people are taking their health seriously. The busy life and schedule are strongly impact the lives of an individual. Thus, people are practicing yoga as it helps to keep the mind, body, and soul in balance and in shape. To practice yoga, yoga poses are the foundation which gives you brief understanding of your yoga journey. Correct yoga poses offer a better experience and are also beneficial, especially for beginners. Hence, we present the 5 easiest standing yoga poses for beginners with their steps, benefits, and cons for a smooth yoga journey.
5 Easiest Standing Yoga Poses for Beginners
A. Tadasana (Mountain Pose)
Steps
- Stand on a mat with a straight-legged posture, the feet together, heels slightly apart, and wide-set toes.
- Draw your weight evenly into the body and slowly lift your kneecaps.
- Open your chest wide, straighten your spine, and keep your shoulders aligned over your hips.
- Stretch your hands straight up with palms facing forward.
- Tilt the crown of the head upwards without tilting the chin upwards but keeping it parallel to the ground.
- Remain in a steady pose for 15-30 seconds, breathing slowly.
- Bring your hands down and back into a normal standing position.
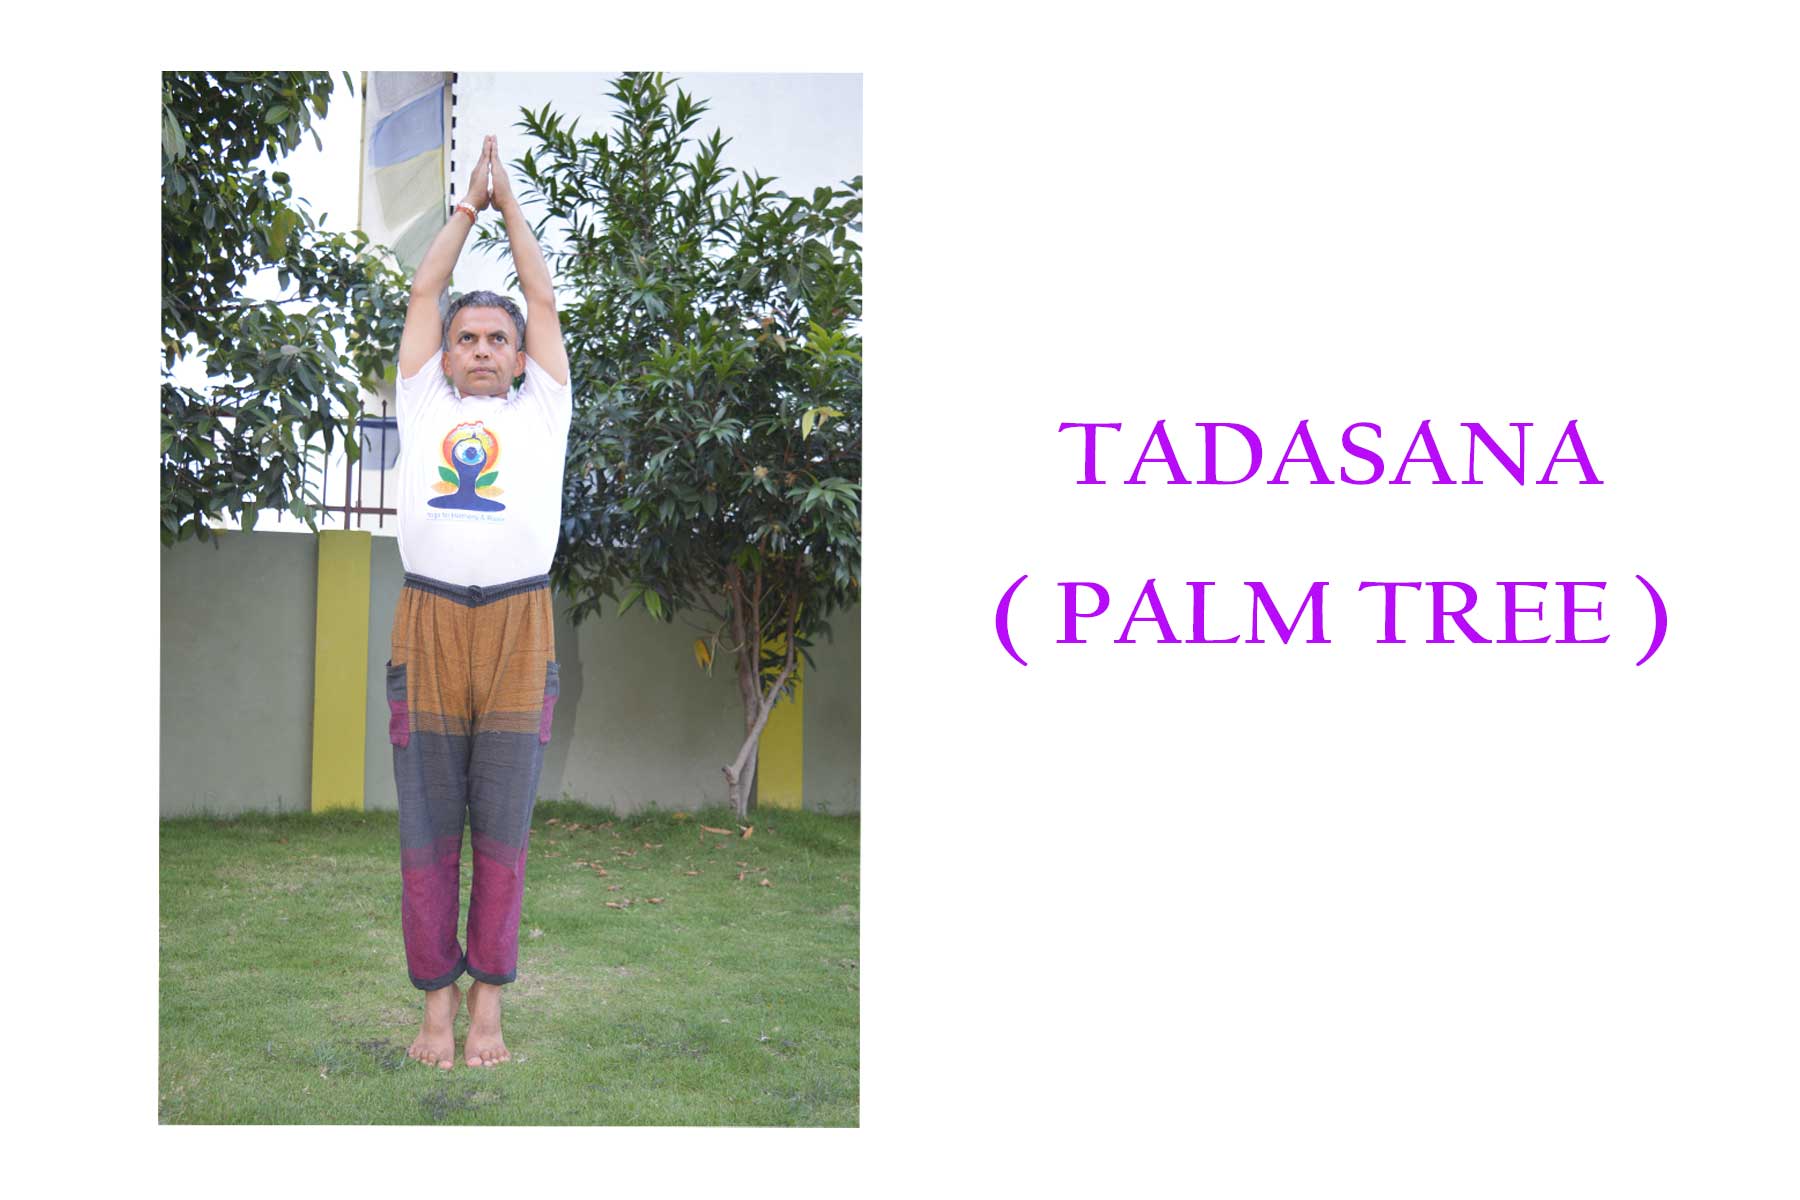
Tadasana Benefits
- Increases body awareness, promoting better balance and coordination
- Proper body alignment improves blood circulation and respiration
- Calms the mind and improves concentration, promoting mental focus
Tadasana Cons
- Avoid knee locking for those people who have knee problems
- Improper alignment of hips, feet, or shoulders causes strain in the lower back or knees
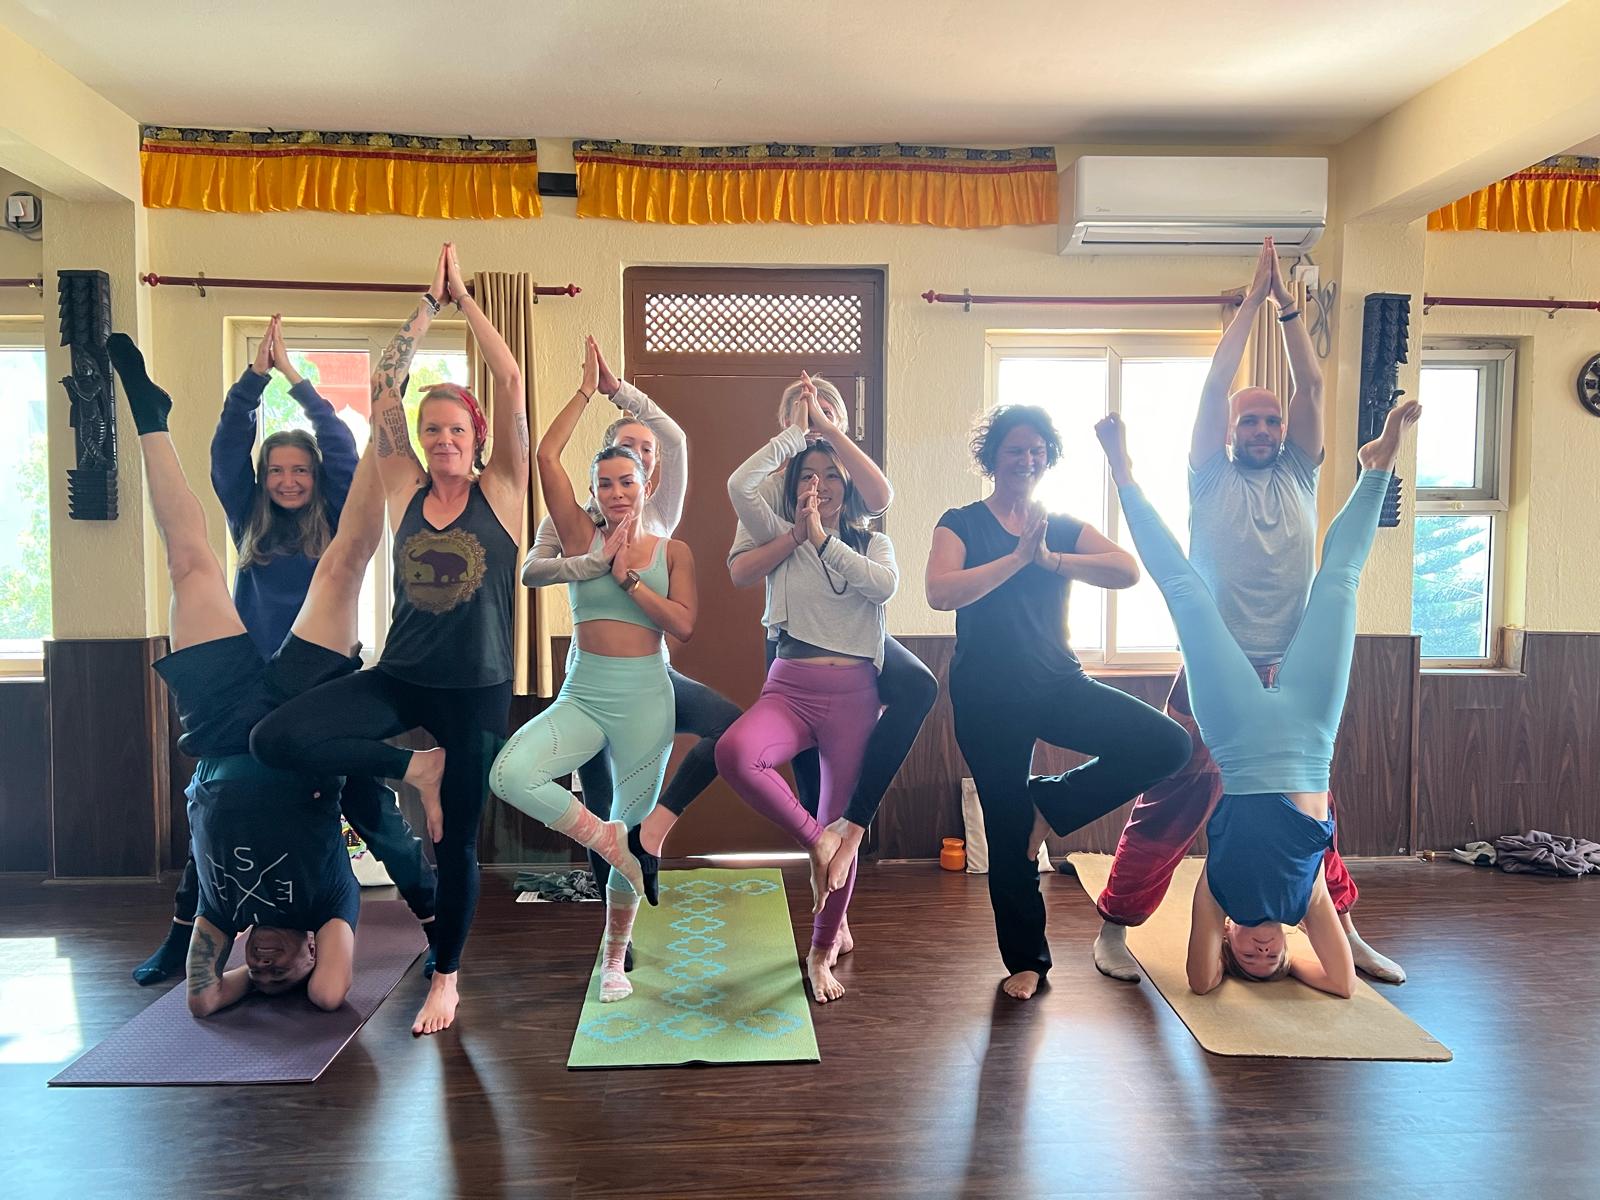
B. Vrikshasana (Tree Pose)
Steps
- Stand erect. Keep the feet together.
- Fold the right leg and placed it at the top of the left thighs with the toes of the right leg should point downwards.
- The right leg should perpendicular to the left leg.
- Extend your arms above your head.
- Inhale and try to make Namaskar mudra with your palms.
- Balance the pose as long as you can because balancing is of utmost importance in the Tree pose.
- Try to make your spine straight and feel the stretching from toes to fingers.
- With a deep exhale bring your arms and leg down.
- Repeat the same with the left leg. It completes one round.
- Do three-five rounds.

Vrikshasana Benefits
- Strengthen the bones of the hips and legs
- Calms and relaxes the central nervous system
- Helps to cure rheumatic pain and also treats numbness
Vrikshasana Cons
- Avoid people suffering from acute knee problems, Hip injury
- Avoid if you are suffering from migraine, insomnia, or low or high blood pressure
C. Utkatasana (Chair Pose)
Steps
- Stand erect with your feet slightly apart.
- Stretch your hands to the front with palms facing downwards. Do not bend your elbows.
- Bend the knees and gently push your pelvis down as if you are sitting in an imaginary chair.
- Be comfortable and imagine yourself doing activities sitting on a chair to get a better real.
- Ensure that you keep your hands parallel to the ground.
- With awareness, sit straight and lengthen your spine. Relax.
- Sink deeper into the chair by gradually going down but ensure that your knees don’t go beyond your toes.
- Keep going down slowly and then sit down in Sukhasana (cross-legged posture) or lie down on your back and relax.
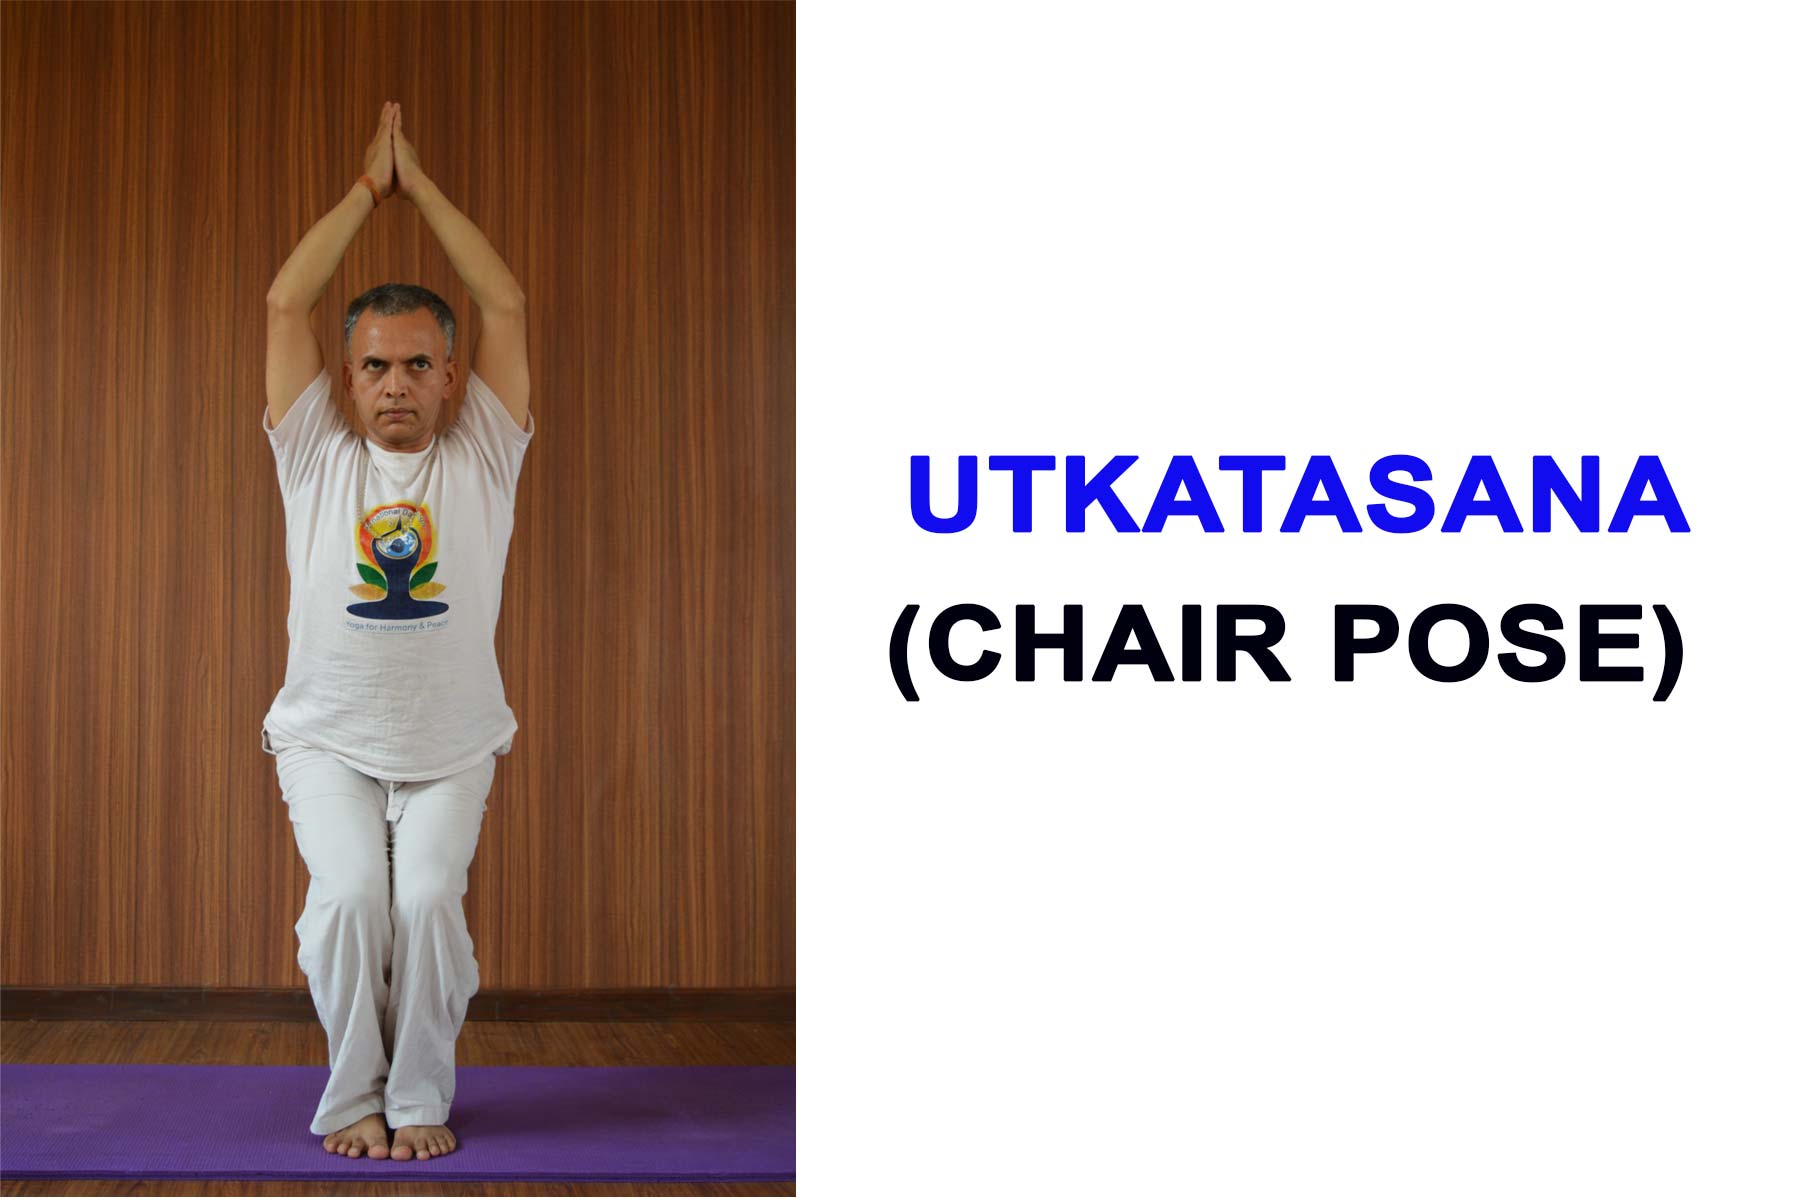
Utkatasana Benefits
- Helps strengthen the lower back and torso
- Tones the thigh, ankle, leg and knee muscles
- Builds core and improves body balance
Utkatasana Cons
- Avoid if you have chronic knee pain, arthritis, or sprained your ankle
- Don’t practice if you have lower back pain
D. Trikonasana (Triangle Pose)
Steps
- Stand straight on the mat with medium stance (about 3 to 4 feet).
- Inhale and stretch your arms at shoulder level.
- Rotate your right foot out 90 degrees and left foot in by 15 degrees and exhale.
- Place your right hand on your right shin bone.
- Raise your left hand upward and gaze at your left thumb.
- Keep taking long, deep breaths.
- Inhale, bend the right knee, and resume the standing position.
- Repeat the same process facing right or using left side.
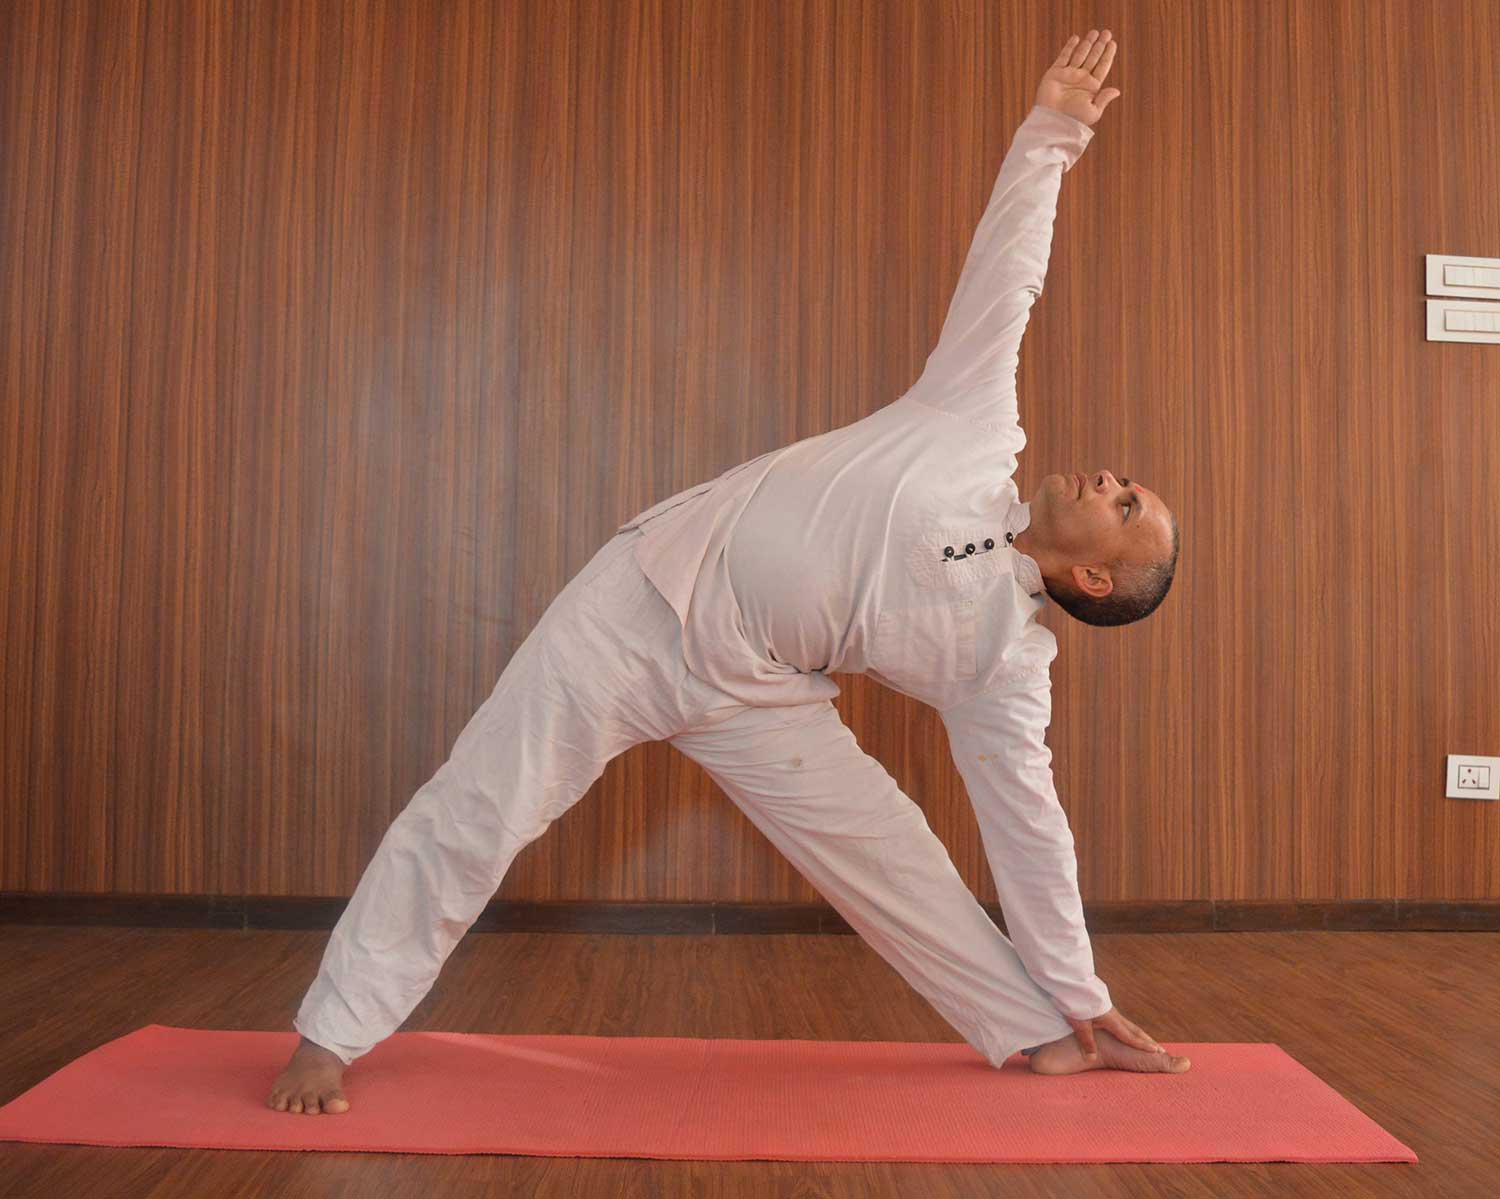
Trikonasana Benefits
- Opens the chest and promotes deep breathing
- Balance and coordination improves
- Stimulates digestion and relieves stress
Trikonasana Cons
- Incorrect alignment causes strain to the lower back, hamstrings, or neck
- Over-extension is avoided, especially with tight hips or legs
E. Uttanasana (Standing Forward Bend)
Steps
- Place your feet either width apart or together as you stand on the mat.
- Exhale, then bend forward from the hips rather than the waist area.
- Reach your palms or fingertips towards the floor slightly in front of or beside your feet. Knees can be either bent or straight.
- Lift or lengthen the front torso just a little bit after with each inhalation, and with each exhalation, release more fully into the forward bend.
- Hold steadily and evenly breathe for as long as it is comfortable.
- To come out of the pose, bend your knees until your body hit your thighs.
- Then, plant your heels firmly on the ground and softly raise your spine.
- Lastly, raise your head and shoulders.

Uttanasana Benefits
- Stretches hamstrings, calves, and back
- Relieves stress by calming the mind
- Stimulates liver, kidneys, and digestive system
Uttanasana Cons
- Immediate rise can cause dizziness
- May strain lower back if knees are locked or back is rounded
Conclusion
The 5 easiest yoga poses for beginners are simple and best to practice. These yoga poses help in strengthening the backbone, maintain the body posture, and also offer mental clarity. Practicing these easy yoga poses builds a foundation to do yoga in a proper way, creating a way to learn more yoga poses. It motivates you to build confidence and strength to practice more advanced yoga poses with ease.
Written By: Anjali B
Yogic Relaxation Techniques
In today’s fast-paced world, stress has become a part of daily life, often affecting our body, mind, and spirit. Yogic relaxation techniques offer a holistic approach to healing and rejuvenation, promoting balance and harmony on all levels of being. These ancient practices, rooted in the wisdom of yoga, help us unwind deeply, releasing tension and restoring our natural state of peace.
1. Physical Relaxation: Letting the Body Rest
The first step to total relaxation begins with the body. Physical stress can manifest as stiffness, fatigue, or restlessness. Yogic techniques help soothe the nervous system and relax muscles.
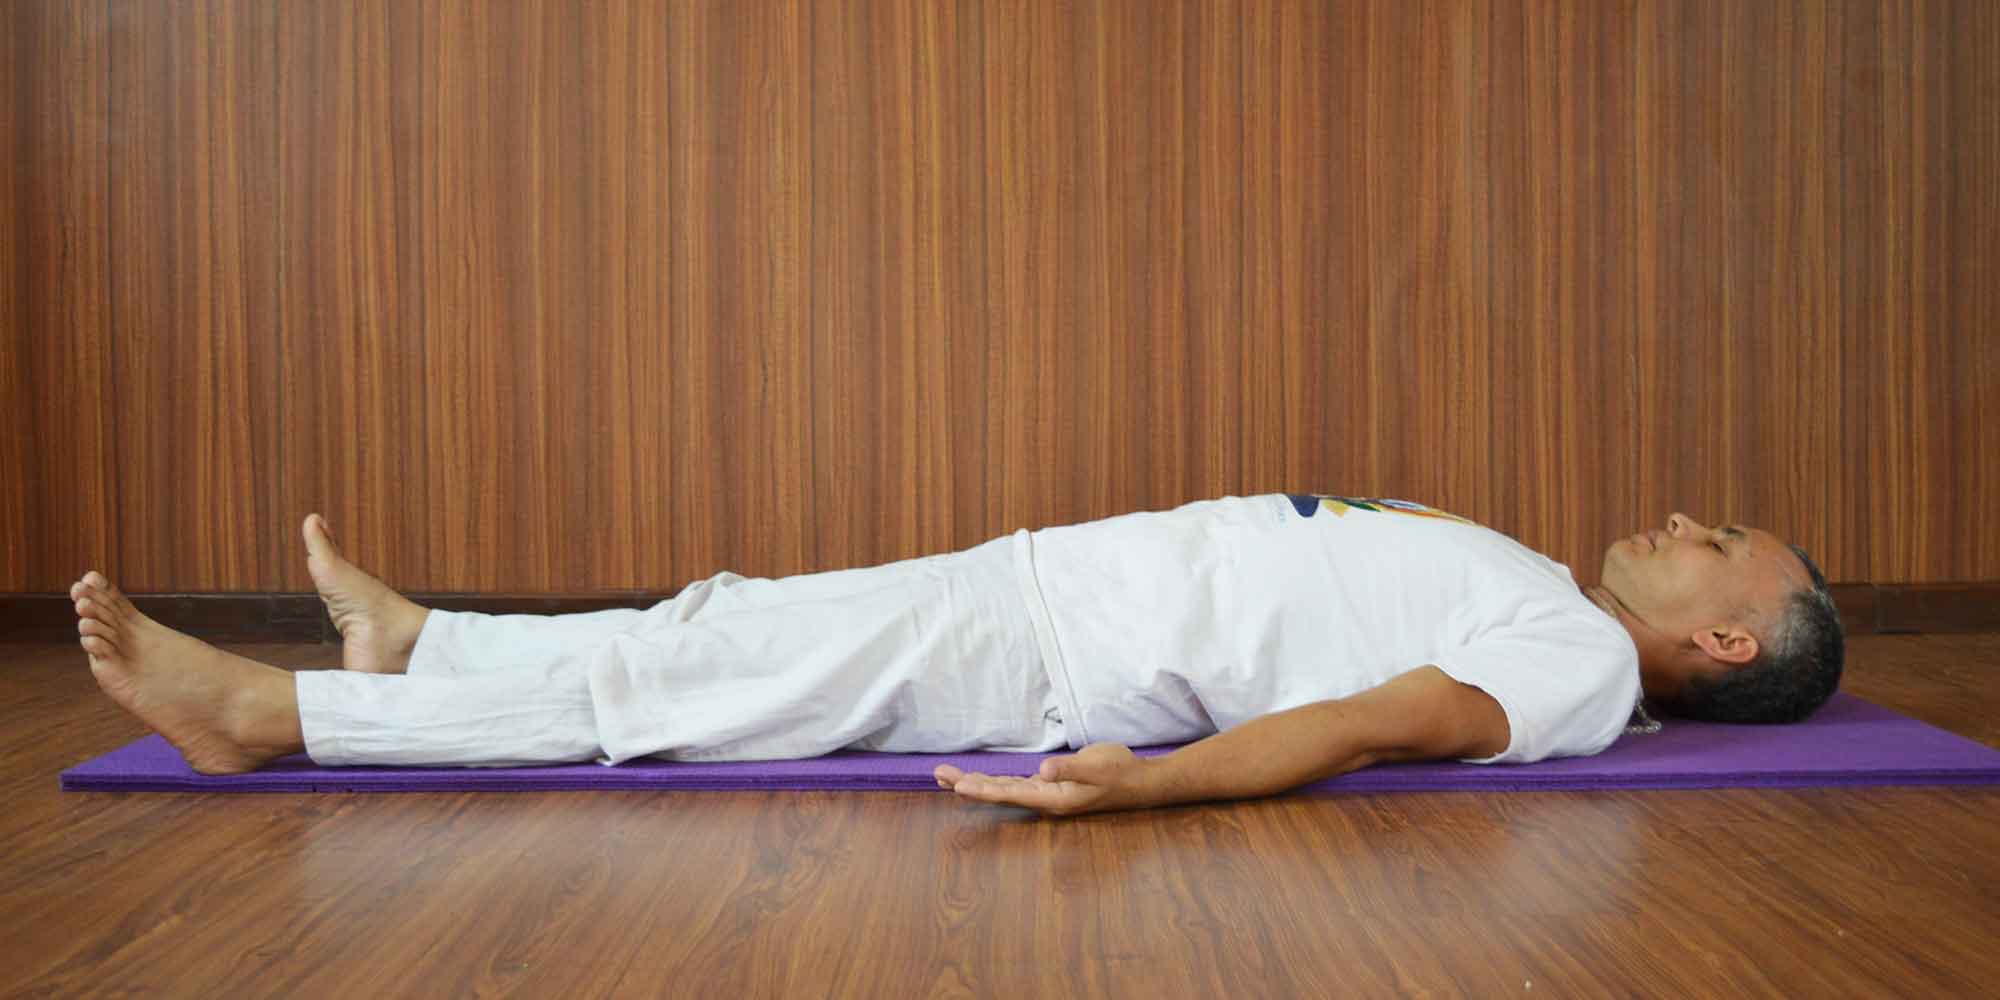
Shavasana (Corpse Pose): This is a fundamental pose used at the end of every yoga session. It involves lying flat on the back, arms by the side, and consciously relaxing each part of the body. The focus is on complete stillness and letting go.
Progressive Muscle Relaxation: This method involves tensing and releasing individual muscle groups, helping develop awareness of where tension is stored.
Gentle Asanas: Practicing restorative poses like Child’s Pose (Balasana) or Legs-Up-the-Wall (Viparita Karani) helps calm the body and prepares it for deeper relaxation.
2. Mental Relaxation: Quieting the Mind
A busy mind can lead to anxiety, insomnia, and a lack of clarity. Yogic practices help slow down mental chatter and bring about a sense of calm.
Pranayama (Breath Control): Techniques like Nadi Shodhana (alternate nostril breathing) or Bhramari (humming bee breath) balance the nervous system and calm the mind.
Yoga Nidra (Yogic Sleep): This is a guided meditation that leads the practitioner into a deep state of conscious relaxation. It is said to be as restful as several hours of sleep and is effective for reducing stress and anxiety.
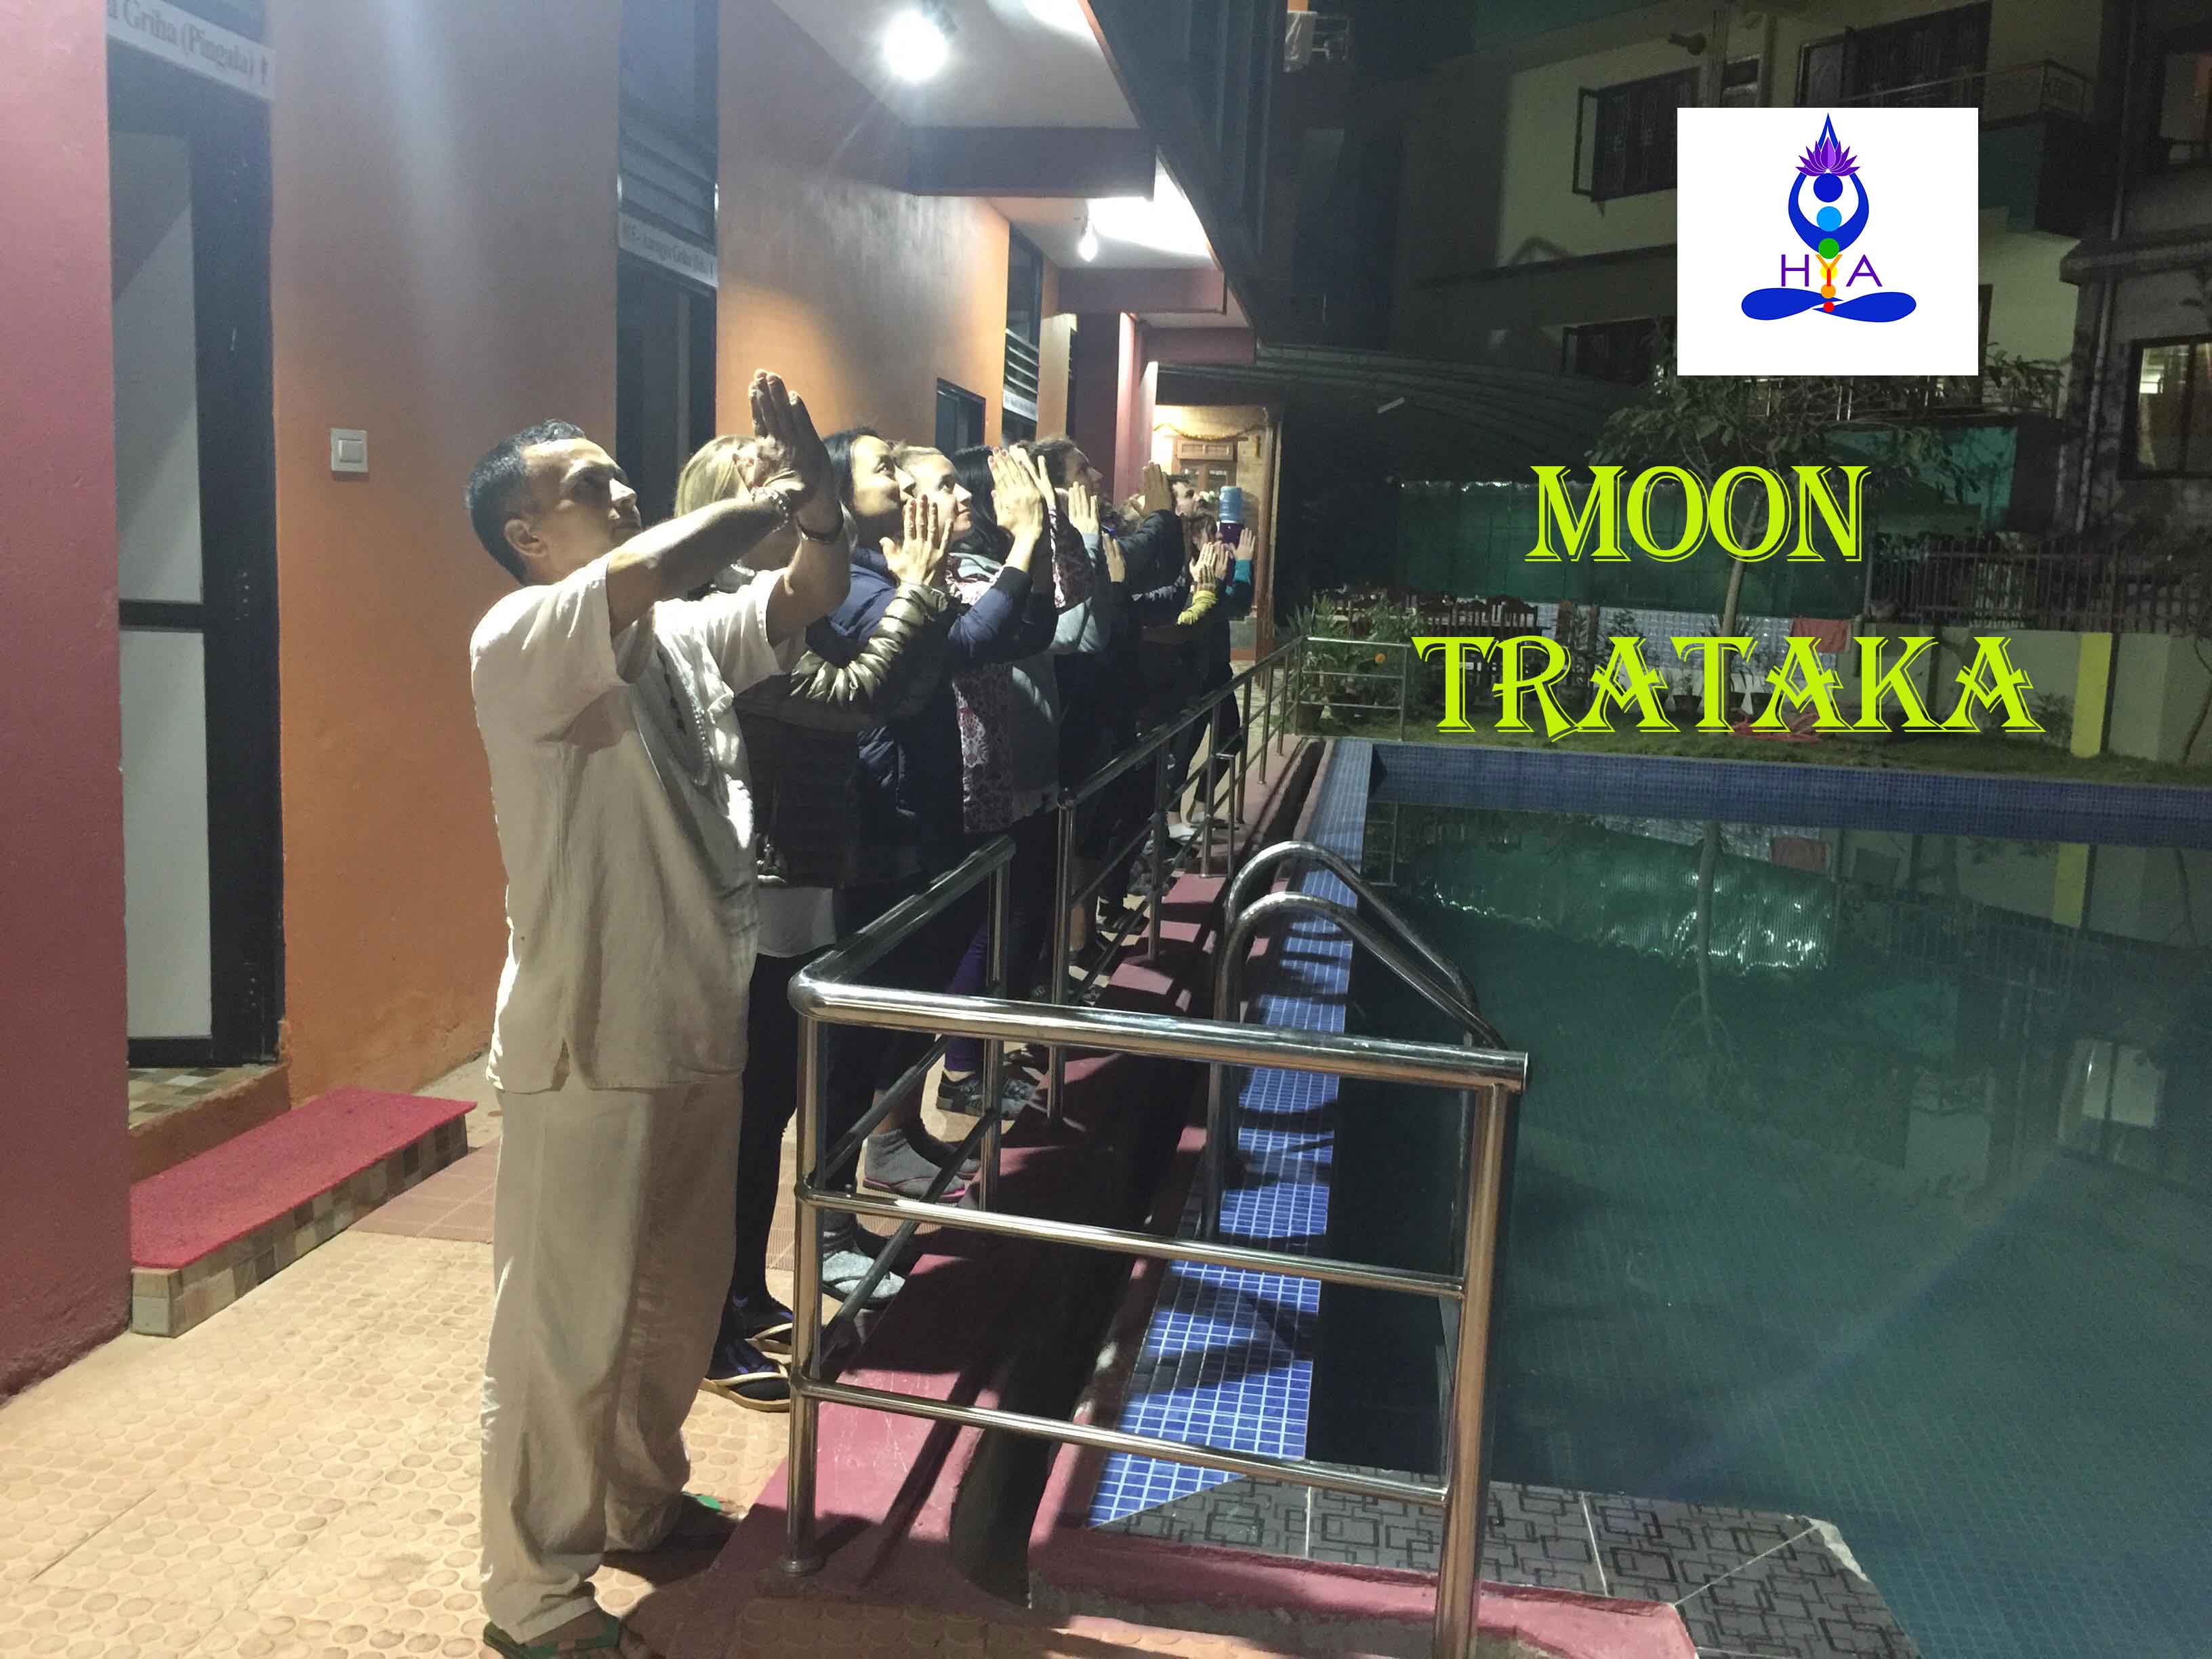
Trataka (Candle Gazing): A meditative technique that involves fixing the gaze on a candle flame. It improves focus, calms the mind, and can even aid in emotional release.
3. Spiritual Relaxation: Connecting Within
True relaxation isn’t complete until the spirit is at ease. Spiritual wellness brings a sense of purpose, peace, and deep inner connection.
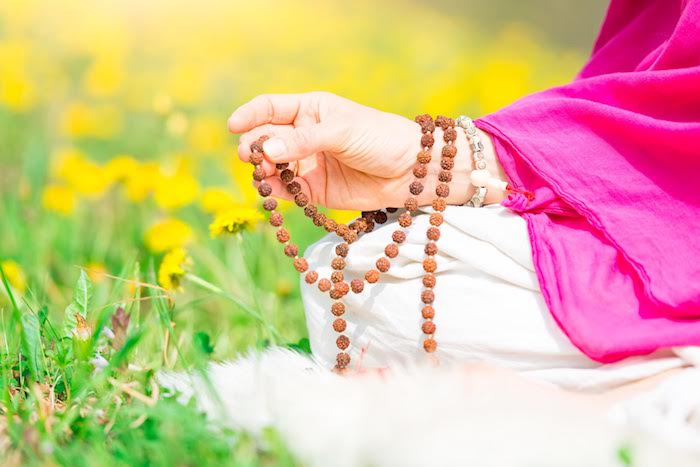
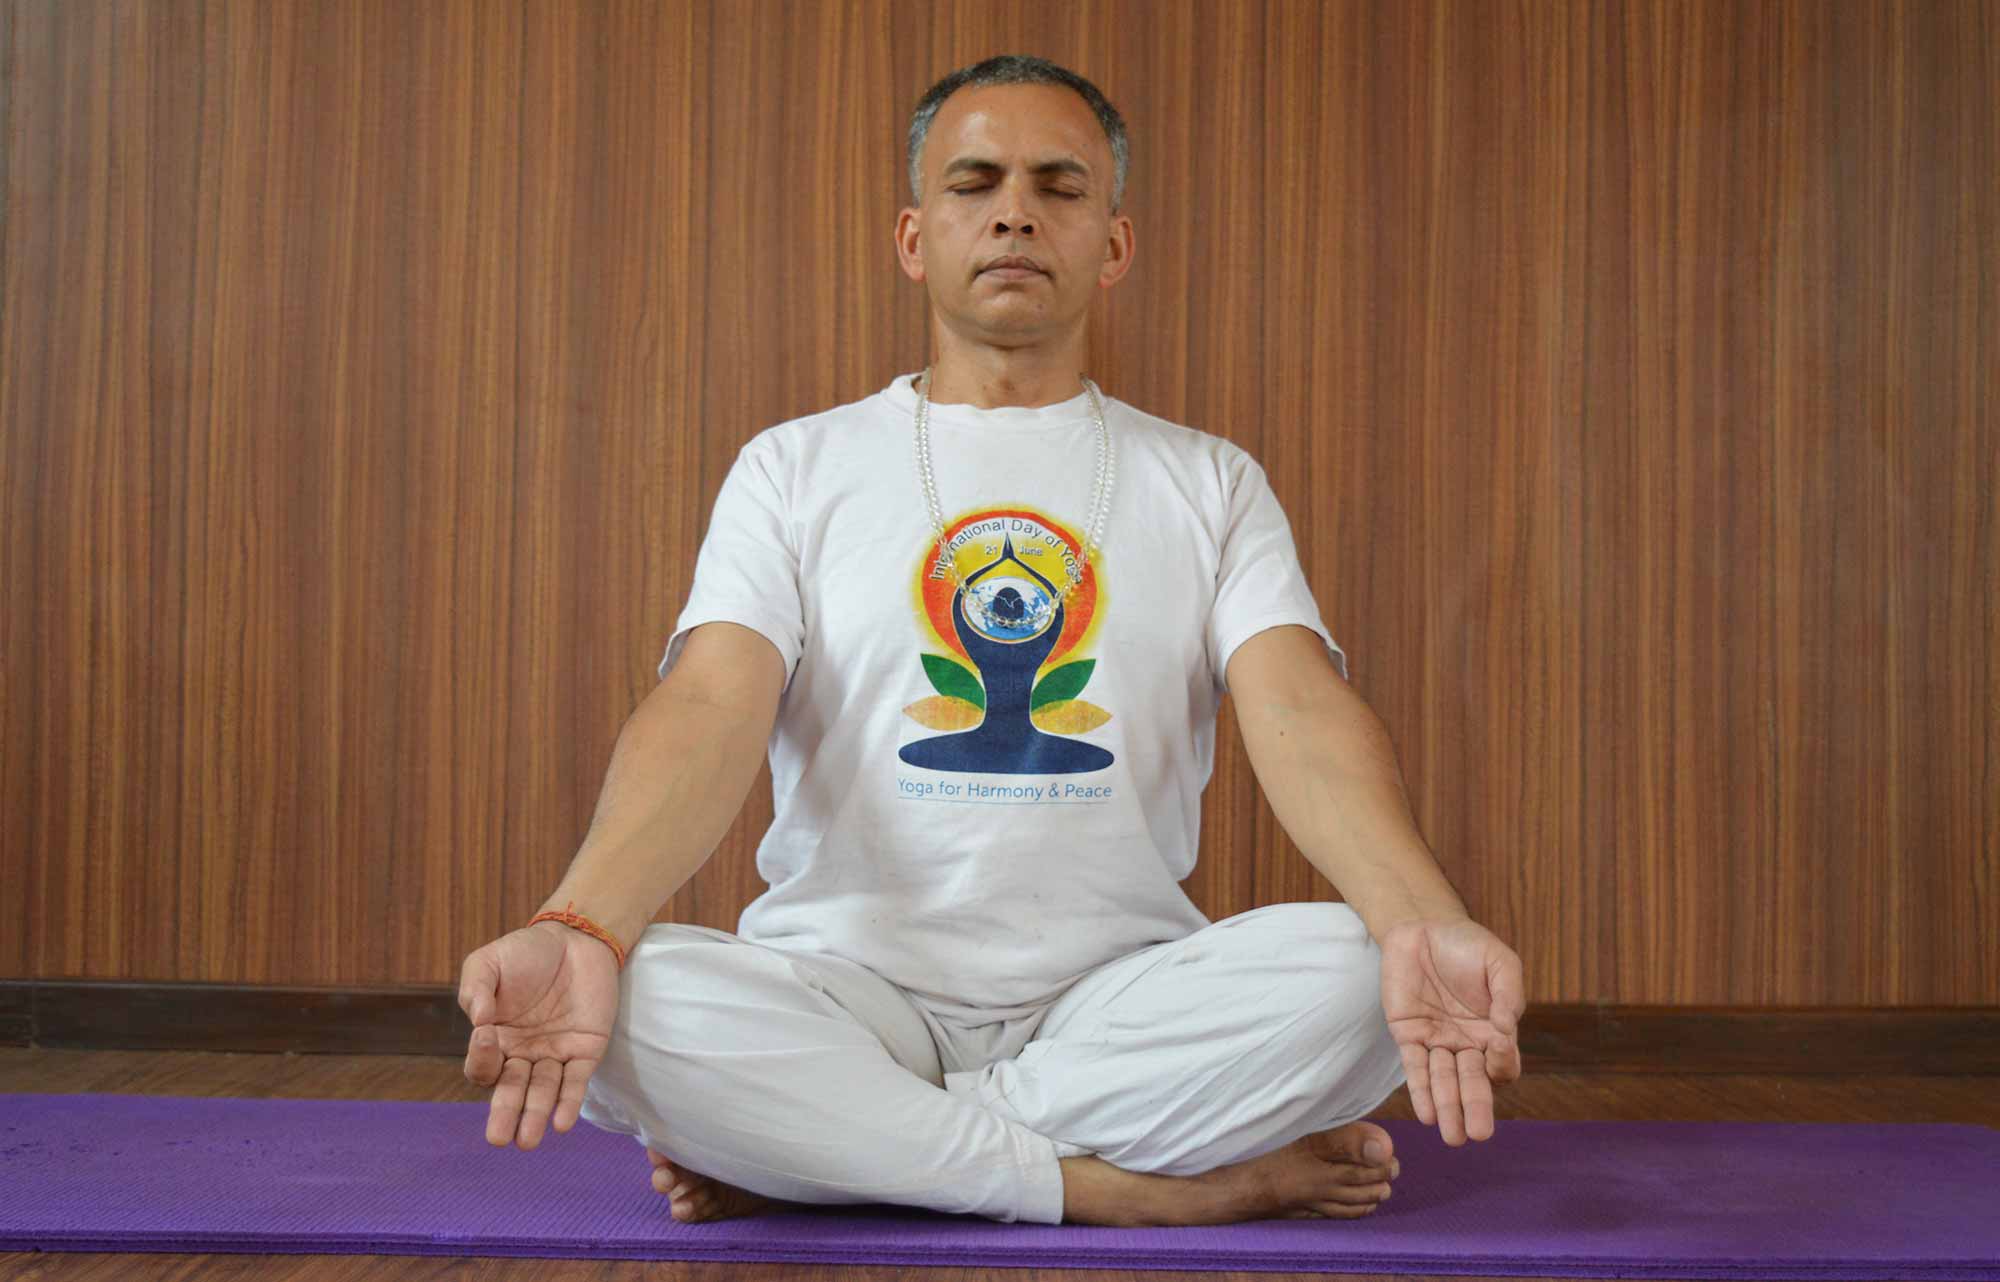
Meditation: Whether it’s silent meditation or mantra chanting, this practice connects you to the inner self. Regular meditation fosters self-awareness and inner peace.
Mantra Repetition (Japa): Repeating a sacred sound like “Om” or a personal mantra helps draw the mind inward, transcending ordinary thoughts and aligning with higher consciousness.
Gratitude and Intention Setting: Taking a few moments each day to reflect on what you’re thankful for and setting positive intentions nurtures a sense of contentment and spiritual clarity.
Also Read: Yogic Concept of Health
Conclusion: A Path to Wholeness
Yogic relaxation is not just about taking a break — it’s a journey toward wholeness. By combining physical stillness, mental clarity, and spiritual connection, these techniques offer deep healing and lasting wellness. Whether you’re new to yoga or a seasoned practitioner, integrating relaxation into your daily routine can transform your life from the inside out.
So take a deep breath, lie down in Shavasana, and begin the journey back to yourself — relaxed, renewed, and reconnected.
Yoga for Teens
Yoga is a great way to support overall well-being by building confidence, balance, and self-awareness. It is a natural way to enjoy good physical, emotional, and mental health in this busy world. Yoga is fit for all age groups, as its multiple benefits help people stay healthy and clear-minded. Among several age groups, Yoga for Teens or Adolescents also marks a significant importance in their growing period of physical, emotional, and mental changes. Teens, whether girls or boys, face different challenges such as bodily and hormonal changes, educational stress, and socializing. As changes happen, Yoga for Teens proves to be a life-changing tool to nurture their physical, emotional, and mental growth.
Why Yoga for Teens?
Yoga for teens is not only about physical and mental growth, but it’s also for emotional growth. Teens find it hard to deal with rapid emotional changes in this fast-paced, growing world. The instant changes in relationships are making it tougher to accept the reality as it is. Yoga for teens is here to support them in their overall growth and provide insight to reflect as well as accept themselves.
a. Improves Self-Esteem and Body Positivity
Yoga improves self-esteem and body positivity by allowing one to accept oneself. It further enhances in building of a healthier and compassionate relationship. The self-acceptance boosts self-esteem and embraces the positive outcomes in a life.
b. Supports Emotional Balance
Hormonal changes during puberty cause mood swings, anxiety, and irritability. It is a natural process, but for teens, several doubts arise within themselves. This leads to an increase in stress. Yoga promotes emotional stability by enhancing calmness and emotional balance.
c. Increases Concentration
Regular yoga practices develop a habit of consistency and build focus. The sharpened focus helps to increase concentration. As a result, it gives clarity to perform any tasks mindfully and make proper decisions. An ability to manage everything on time also develops.
d. Builds Physical Strength and Flexibility
Daily Yoga practices build physical strength, improving the right body postures. It further increases flexibility, allowing the body to stretch properly and be free of any bodily pains or injuries. Not only does the flexibility in the body grow, but the mind also develops, which supports thinking more actively.
e. Inspires Mindful Living
Regular Yoga practice inspires mindful living as it instills values like patience, resilience, empathy, and gratitude. These values support building respectful relationships and make the right choices relating to body, mind, and the soul.

Quick Tips before Starting the Yoga Journey
- Select age-appropriate classes with an experienced yoga instructor who understands how to work with teens or adolescents.
- Practice Yoga in such an environment where you feel safe and comfortable to explore new poses and express yourself openly.
- Wear comfortable clothes for the free movement of the body while practicing yoga poses.
- Consistency is a key to making a difference. Thus, be consistent and practice even if it is only for 10–15 minutes daily.
- To keep Yoga sessions engaging and entertaining, integrate fun activities such as soothing music, storytelling, or themed Yoga classes.
- Enjoy the journey and don’t only focus on the result, thus stay patient.
Also Read: Yoga for Kids
Beginner Yoga Poses for Teens
A. Tadasana (Mountain Pose)
Steps
- Stand on a mat with a straight-legged posture, the feet together, heels slightly apart, and wide-set toes.
- Draw your weight evenly into the body and slowly lift your kneecaps.
- Open your chest wide, straighten your spine, and keep your shoulders aligned over your hips.
- Stretch your hands straight up with palms facing forward.
- Tilt the crown of the head upwards without tilting the chin upwards, but keeping it parallel to the ground.
- Remain in a steady pose for 15-30 seconds, breathing slowly.
- Bring your hands down and back into a normal standing position.

Tadasana Benefits
- Increases body awareness, promoting better balance and coordination
- Proper body alignment improves blood circulation and respiration
- Calms the mind and improves concentration, promoting mental focus
Tadasana Cons
- Avoid knee locking for those people who have knee problems
- Improper alignment of hips, feet, or shoulders causes strain in the lower back or knees
B. Cat-Cow Pose (Marjari-Bitilasana)
Steps
Set yourself in Bharmanasana (tabletop position), keep the hips directly above the knees, and the hands shoulder-width apart.
For Bitilasana (Cow Pose):
- Inhale as you allow the tummy to drop toward the mat, lifting your chest and tailbone.
- Open your chest and bend your back, looking slightly upward.
For Marjari (Cat Pose):
- Exhale as you round your back toward the ceiling.
- Tuck your chin in toward your chest and draw your navel toward your spine.
- Extend the stretch by pressing the mat with your hands and knees.
- Continue with these two postures, consecutively, in sync with your breath.
- Practice 5-10 rounds of the Marjari-Bitilasana pose effortlessly with every inhale and exhale.

Marjari-Bitilasana Benefits
- Promotes better breathing sequences
- Stimulates internal organs for a youthful and energetic body
- Improvement in digestion increases metabolism, helping in weight loss
Marjari-Bitilasana Cons
- Inappropriate practice causes lower back or spine irritation
- Overstretching causes stiffness in the neck or back
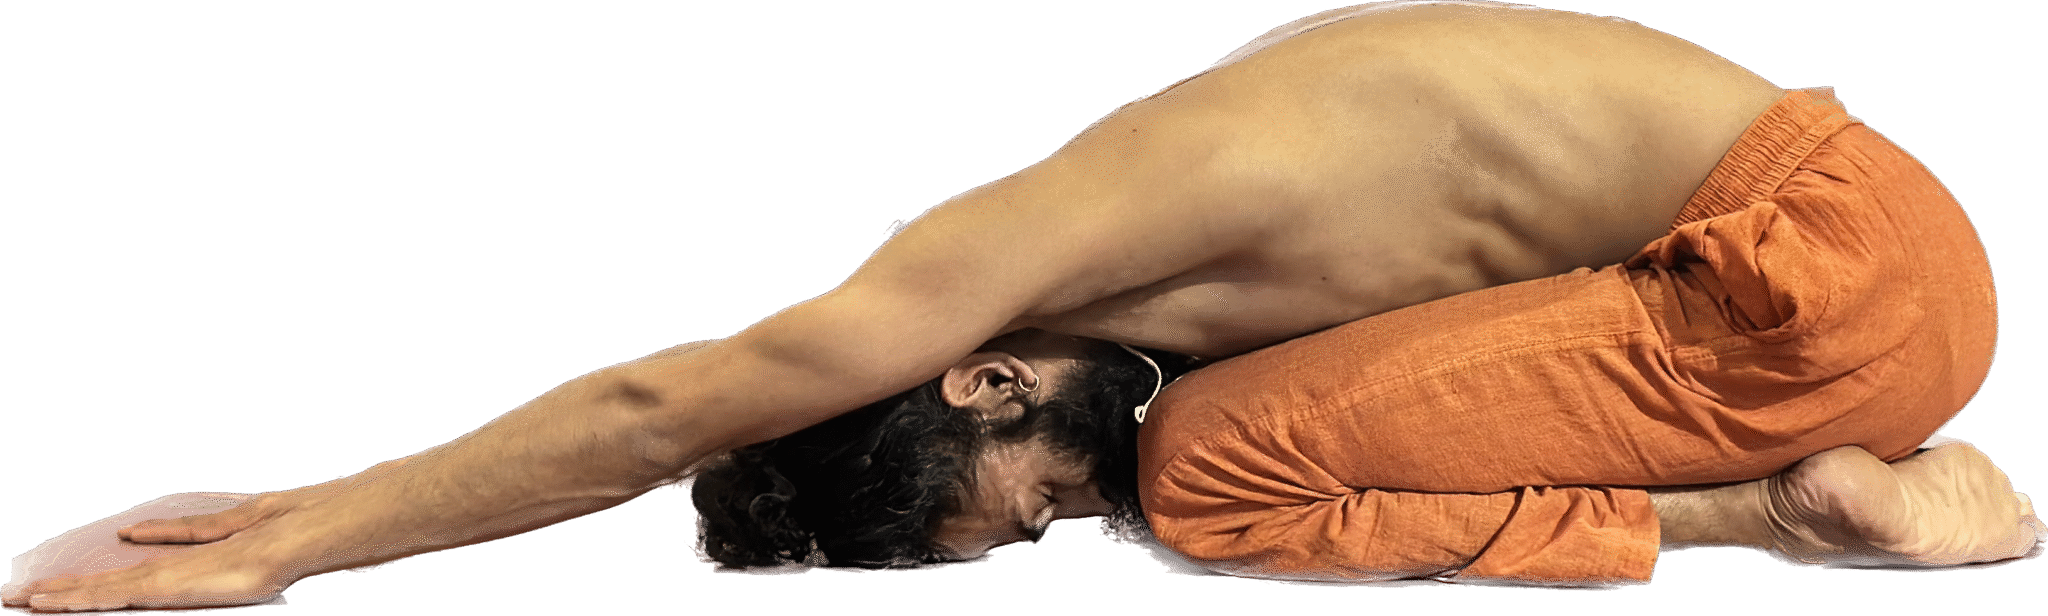
C. Child’s Pose (Balasana)
Steps
- Kneel on the mat, big toes touching.
- Keep your knees wide apart.
- Sit back on your heels.
- Come to the table pose.
- Exhale and lower your hips to the heels.
- Lower your forehead on the mat.
- Keep your knees in a comfortable position.
- Stretch your arms in front, stacked under the forehead or alongside your body.
- Breathing slowly, hold for 1–3 minutes.
- Slowly inhale up, release, and get back to a seated position.
Balasana Benefits
- Activates the parasympathetic nervous system
- Supports blood pressure regulation
- Promotes deep, cooling breaths and keeps the mind calm
Balasana Cons
- Avoid those with knee problems or hip tightness
- This asana may raise cranial pressure in some hypertensive individuals
D. Paschimottanasana (Seated Forward Bend)
Steps
- Sit on the mat and bring both legs in front of you with pointed toes inward.
- Keep your back straight, lengthen the spine, and expand the chest.
- Inhale and raise both hands, extending the spine further.
- Bring the hands in alignment with the ears.
- Exhale, bring the chin out, and bend down as far as you can.
- Reach for your feet, ankles, or toes to improve your flexibility.
- Bring your elbows down on either side of the feet.
- Bring your forehead to rest on your legs.
- Raise your hands slowly in line with your ears.
- Inhale, extend the spine upward.
- Exhale, bring both hands down, and release.
Paschimottanasana Benefits
- Promotes youthfulness by giving clarity and flexibility to the mind
- Stretching improves flexibility in the body
- Eases the nervous system and relieves pain in the hamstring, calf, neck, and lower back muscles
Paschimottanasana Cons
- An incorrect practice causes strain on the lower back, shoulders, neck, or hamstrings
- Be careful while stretching too much, as there’s a risk of rounding the back
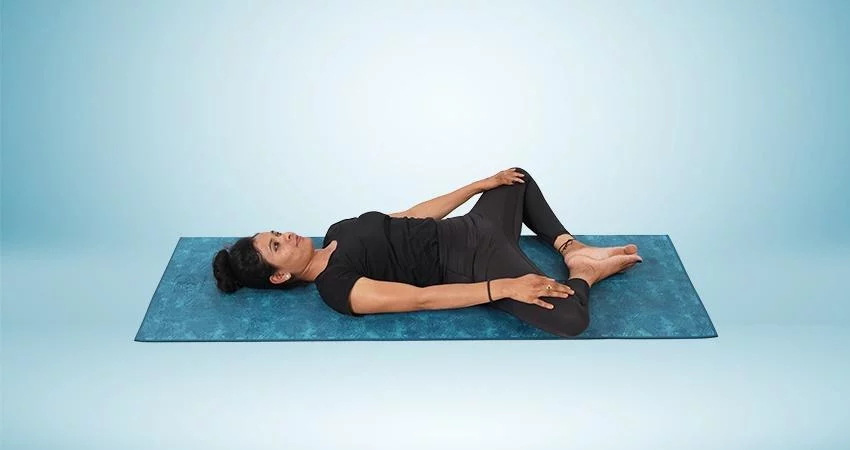
E. Supta Baddha Konasana (Reclining Bound Angle Pose)
Steps
- Sit with a straight spine on a mat.
- Bend your knees and bring your feet’ soles together in a diamond shape.
- Slowly lie on your back on a mat.
- Place a cushion, yoga blocks, or blankets under each knee if needed.
- Beginners can use a bolster or pillow on their back for support.
- Close your eyes, stay for 5–10 minutes, breathing slowly and deeply.
- Feel Relaxed while exhaling.
- Slowly come up using your hand’s support.
Supta Baddha Konasana Benefits
- Gently opens the hips and pelvis
- Calms the nervous system and reduces stress
- Relieves menstrual cramps and tension, and controls PCOS symptoms in girls
Supta Baddha Konasana Cons
- Not suitable for those with knee or hip injuries
- Slightly uncomfortable for those with lower back pain and those with tight hips
Also Read: Top 7 Yoga Poses for Youthfulness
Conclusion
Teens or adolescents are a phase where they often get drawn in many directions. Yoga for teens is a boon as it provides an opportunity for them to understand their body and themselves. It helps to reflect within and reconnect to their inner self for their betterment. Yoga inspires teens to build confidence within themselves by nurturing strength, self-awareness, and quietness. Furthermore, it leads to greater mental clarity and resilience to move ahead positively in their lives.
Written By: Anjali B
5 Yoga Poses for Hypertension Relief
Himalayan Yoga presents an insightful article on 5 Yoga Poses for Hypertension Relief. Stress due to the hectic schedule in this fast-paced life causes the risk of numerous health issues. Hypertension or high blood pressure is among the top health issues people face. People should not neglect hypertension, as it increases the risk of heart disease and stroke. It is one of the prime causes of premature death worldwide. Yoga is one of the best natural methods to relieve hypertension, besides medical treatment and lifestyle changes. Some yoga poses for hypertension relief activate the parasympathetic nervous system. As a result, it reduces anxiety, improves blood circulation, and promotes mindfulness.
What is Hypertension?
Hypertension, or high blood pressure, is a chronic medical condition characterized by constantly raised pressure in the arteries. It develops over time and typically does not show noticeable symptoms on its own. Thus, health follow-up is necessary for proper monitoring.
Types and Causes of Hypertension
Primary and secondary are two types of hypertension. People suffering from primary hypertension are approximately. 90-95%, whereas the remaining 5-10% of people suffer from secondary hypertension.
Primary Hypertension Causes
- Unhealthy food consumption (salty, fatty, and processed foods)
- Physical inactivity
- Obesity or being overweight
- Chronic stress and poor sleep quality
- Smoking and alcohol or substance use
- Age, Genetics, or family history
Secondary Hypertension Causes
- Too much alcohol consumption
- Kidney diseases or hormonal disorders
- Obstructive Sleep Apnea
- Use of medicines such as Antidepressants, decongestants, birth control pills, anti-inflammatory drugs, etc.
Also Read: Yoga and Stress
5 Yoga Poses for Hypertension Relief
Here are 5 yoga poses for Hypertension Relief to integrate into your daily life for a stress-free and healthy lifestyle.
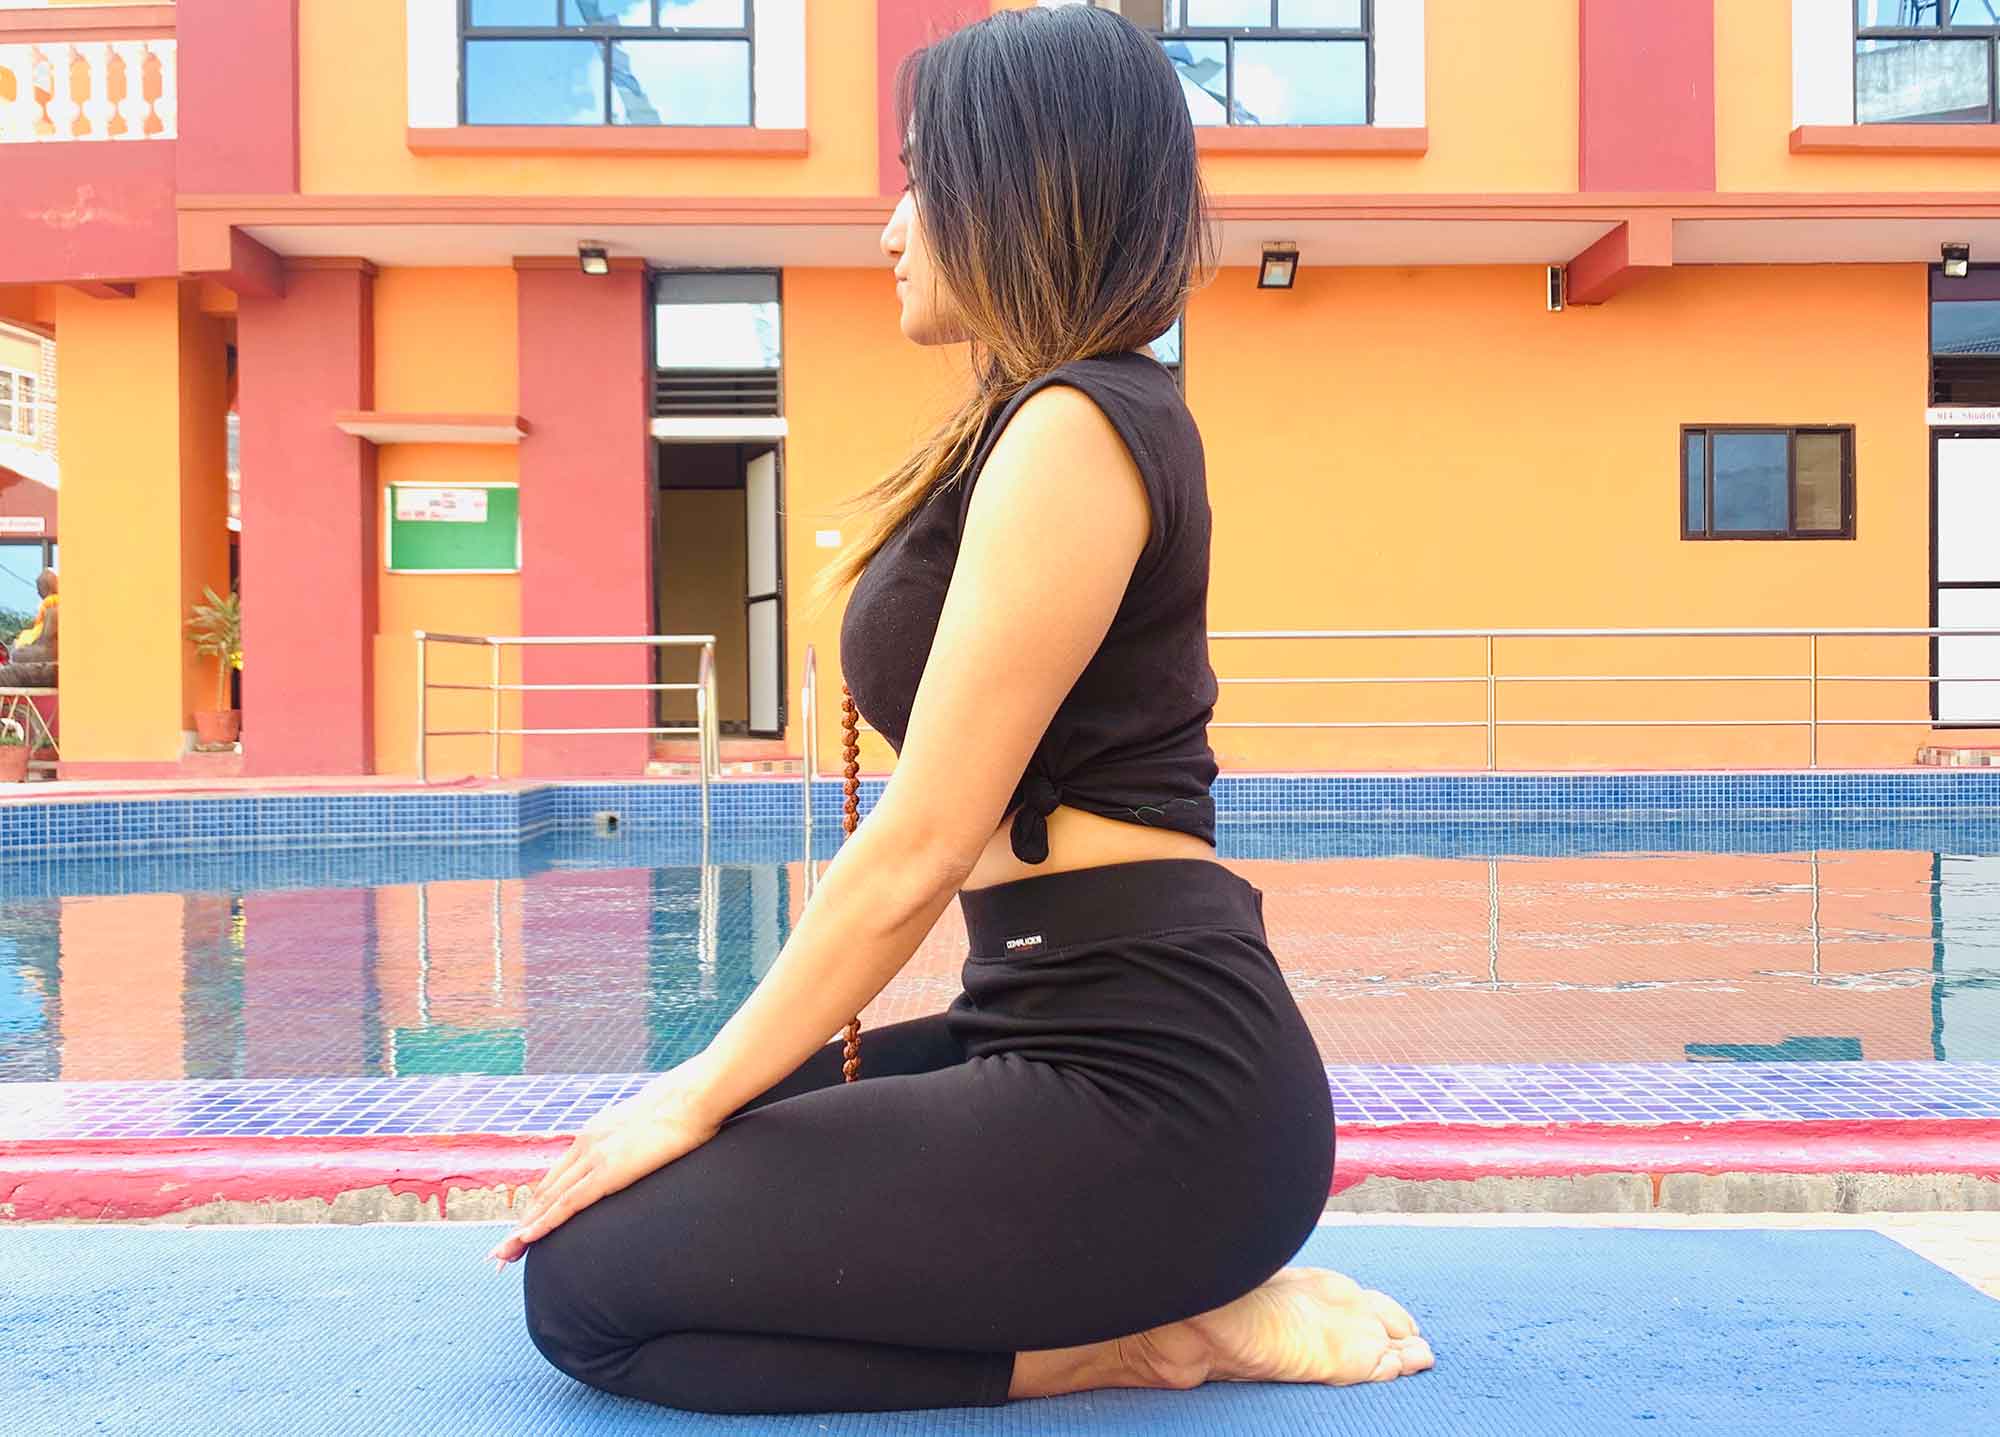
A. Sukhasana (Easy Pose) with Deep Breathing
Steps
- Sit on a mat with straight legs in front.
- Bend the right knee, and bring the right leg sole under the left thigh.
- Bend the left knee, and bring the left leg sole under the right thigh.
- Adjust yourself to sit at ease with a straight spine.
- Place your hands comfortably, palms facing up, on your knees.
- Relax and close your eyes.
- Breath slowly, inhale and exhale deeply through the nose.
- Beginners continue to stay for 3-5 minutes.
- Slowly open your eyes.
- Change the leg position after one session of 3-5 minutes.
- Open the eyes and release slowly.
- With practice, increase the time duration.
Sukhasana Benefits
- Improves body posture and flexibility in the hips, knees, and ankles
- Reduces stress and promotes relaxation
- Parasympathetic nervous system activation regulates blood pressure
Sukhasana Cons
- May cause discomfort in the hips or knees if seated too long.
- Incorrect breathing technique can shoot up pressure.
B. Viparita Karani (Legs-Up-the-Wall Pose)
Steps
- Sit sideways next to a wall.
- Lie back and swing your legs up against the wall.
- Adjust your hips close to the wall.
- Let your arms rest at your sides.
- Stay for 5–15 minutes, breathing deeply.
- Slowly bend your knees and roll over to one side.
- Take a rest and get up gently.

Viparita Karani Benefits
- Releases fatigue and lowers body pressure over time
- Improvement in circulation reduces leg swelling
- Eases stress and offers sound sleep
Viparita Karani Cons
- Avoid those with lower back issues and extreme hypertension
- Not recommended for females during menstruation
C. Ardha Matsyendrasana (Half Spinal Twist)
Steps
- Sit with legs extended on a mat.
- Take your right foot across your left knee.
- Place your right hand behind for support.
- Inhale and raise the left arm.
- Slowly twist and place your left hand on the foot.
- Bend your elbow and place your hand on your right shoulder (if you can’t touch the foot).
- Inhale to stretch, exhale to twist. Hold for 30 seconds and switch sides.
- In one sitting, practice it for only 2 to 3 minutes.
Ardha Matsyendrasana Benefits
- Reduces excess body heat and calms the nervous system
- Develops spinal flexibility
- Purifies the internal organs and promotes digestion
Ardha Matsyendrasana Cons
- Long or incorrect holding of breath can cause a rise in blood pressure
- Avoid during pregnancy and for those with back issues and uncontrolled hypertension
D. Balasana (Child’s Pose)
Steps
- Kneel on the mat, big toes touching.
- Keep your knees wide apart.
- Sit back on your heels.
- Come to the table pose.
- Exhale and lower your hips to the heels.
- Lower your forehead on the mat.
- Keep your knees in a comfortable position.
- Stretch your arms in front, stacked under the forehead or alongside your body.
- Breathing slowly, hold for 1–3 minutes.
- Slowly inhale up, release, and get back to a seated position.
Balasana Benefits
- Safe to practice for people with high blood pressure
- Activates the parasympathetic nervous system, supporting blood pressure regulation
- Promotes deep, cooling breaths and keeps the mind calm
Balasana Cons
- Avoid those with knee problems or hip tightness
- This asana may raise cranial pressure in some hypertensive individuals
E. Setu Bandhasana (Bridge Pose)
Steps
- Lie down on the mat with your arms at your sides on the floor.
- Bend your knees and place your heels close to your butt.
- Hold your ankles, slowly inhale, and raise your hips toward the ceiling.
- Keep your hips level and engage your core to support your lower back.
- Breathe in the normal range, but deeply for 5–10 breaths or as your suitability.
- Exhale and slowly release the posture.
- Gently lower your hips down and lie on the mat.
- Relax in Shavasana.

Setu Bandhasana Benefits
- Helps to lower stress and regulate blood pressure
- Improves blood circulation and body posture
- Encourages deep cooling breath and improves lung capacity
Setu Bandhasana Cons
- Holding your breath for a long time can raise your blood pressure
- Not suitable for people with neck or recent back injuries
Conclusion
Yoga is undoubtedly an effective tool to relieve hypertension with continuous mindful practice. These 5 Yoga Poses for Hypertension Relief prove beneficial for controlling blood pressure, as they encourage relaxation, better circulation, and a calmer mind. However, we advise consulting a doctor or trained instructor before practicing these asanas for a fruitful result.
Written By: Anjali B
5 Yoga Poses to Beat the Heat
The unhealthy eating habits and lifestyle, and soaring temperatures are causing the effects of excess body heat. The excess body heat stimulates tiredness, irritation, dehydration, and sleeplessness, making it hard to stay cool. Avoiding the direct sunlight and staying hydrated are common practice remedies. Apart from this, there are amazing benefits of yoga, offering natural, effective cooling effects within the body. Certain yoga poses trigger the body’s natural cooling system, which promotes internal cooling by easing stress and minimizing inflammation. We present 5 Yoga Poses to beat the Heat to cool you down naturally for relaxation or to deal with hot weather or excessive heat within the body.
5 Yoga Poses to Beat the Heat
A. Sheetali Pranayama (Cooling Breath)
Steps
- Sit in a comfortable cross-legged position on a mat.
- Keep your spine straight.
- Place your hands on your knees in your preferred mudras.
- Stick your tongue out and roll the sides to form a tube, or slightly curl it if you can’t roll.
- Inhale deeply through the rolled tongue, filling your lungs.
- Focus on the cooling sensation of the breath.
- Move your tongue in, close your mouth, and exhale through the nose.
- Repeat for 10–15 rounds or as you prefer.
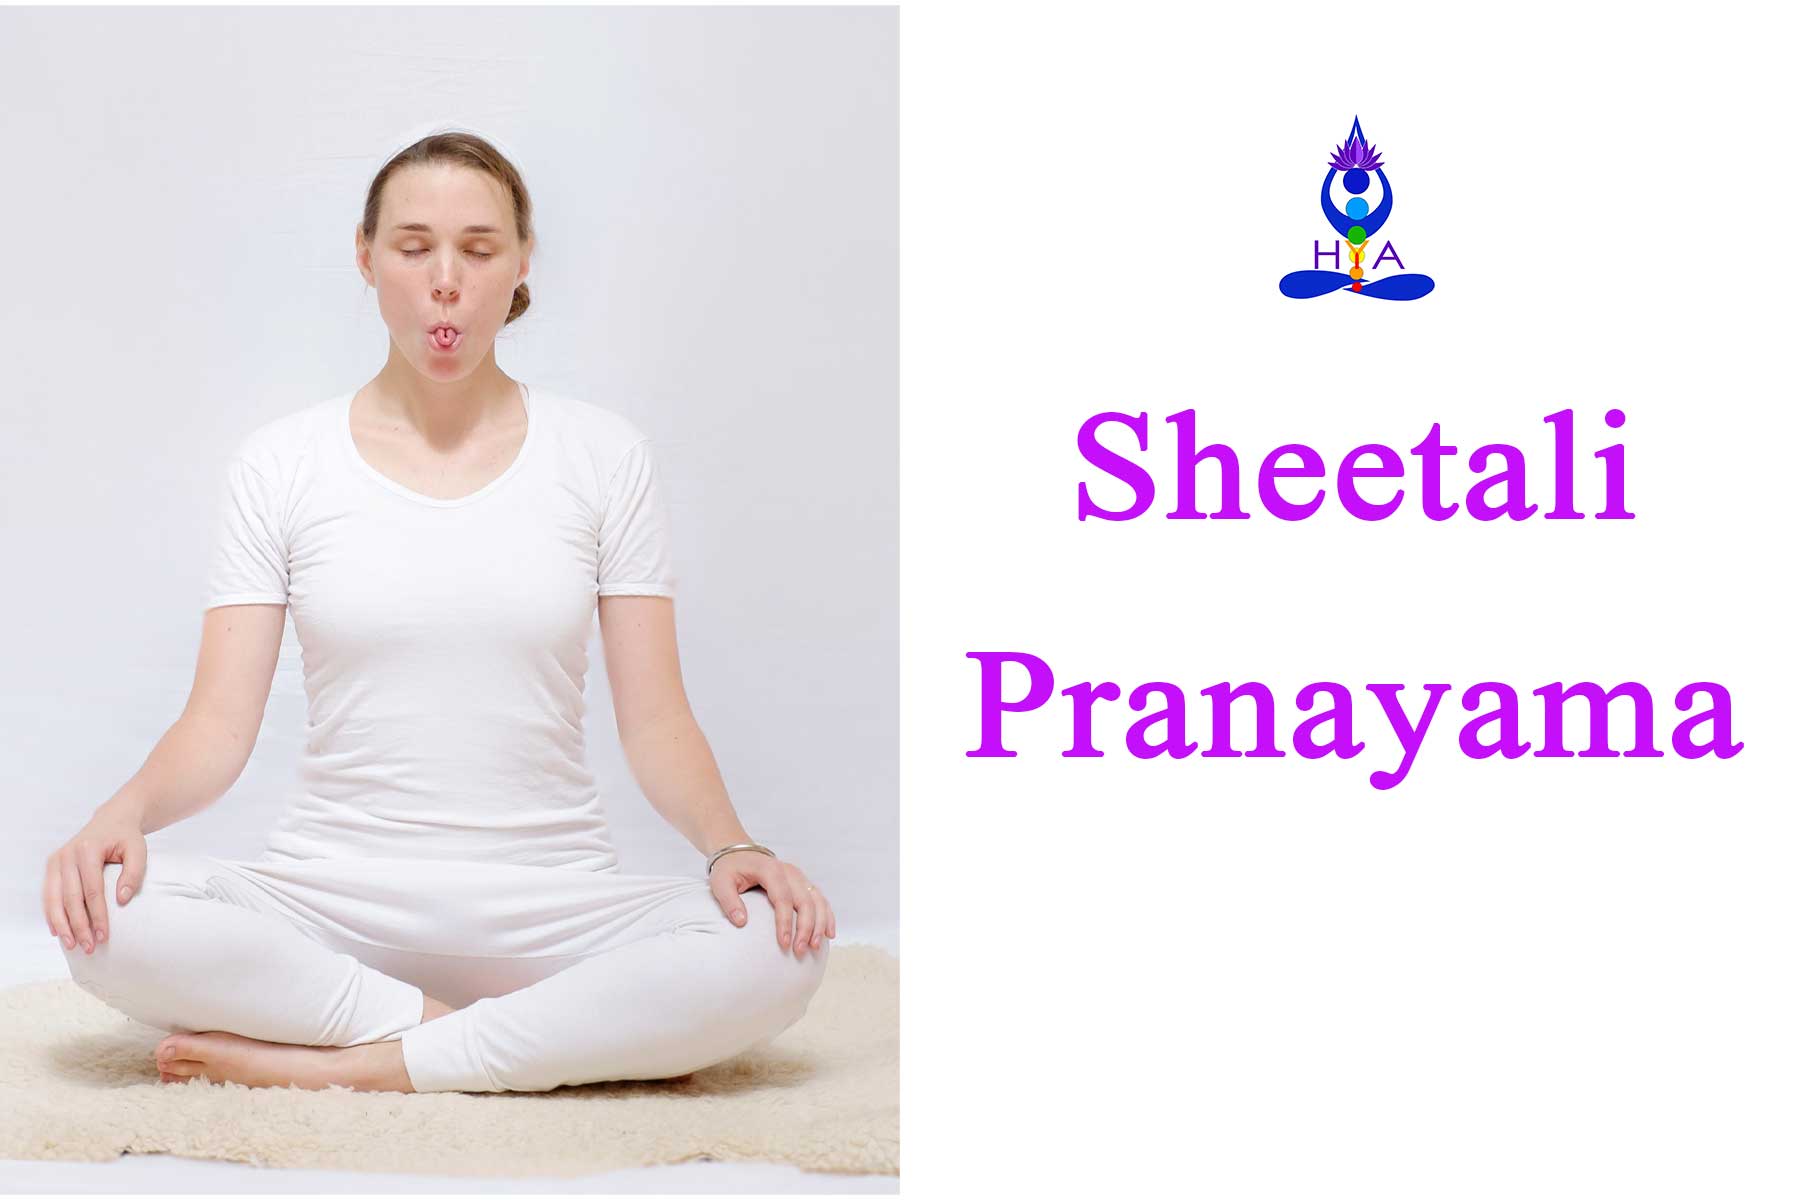
Sheetali Pranayama Benefits
- Cools the internal body temperature and balances pitta dosha
- Reduces stress and anxiety
- Highly beneficial for those with high blood pressure
Sheetali Pranayama Cons
- Not recommended during the cold weather and in extremely polluted environments
- Avoid if suffering from respiratory diseases or low blood pressure
B. Supta Baddha Konasana (Reclining Bound Angle Pose)
Steps
- Sit with a straight spine on a mat.
- Bend your knees and bring your feet’ soles together in a diamond shape.
- Slowly lie on your back on a mat.
- Place a cushion, yoga blocks, or blankets under each knee if needed.
- Beginners can use a bolster or pillow on their back for support.
- Close your eyes, stay for 5–10 minutes, breathing slowly and deeply.
- Feel Relaxed while exhaling.
- Slowly come up using your hand’s support.
Supta Baddha Konasana Benefits
- Great for those with asthma, bronchitis
- Encourages deep, cooling breathing
- Calms the nervous system
Supta Baddha Konasana Cons
- Not suitable for those with knee or hip injuries
- Avoid during lower back pain and third-trimester pregnancy
C. Viparita Karani (Legs-Up-The-Wall Pose)
Steps
- Sit sideways next to a wall.
- Lie back and swing your legs up against the wall.
- Adjust your hips close to the wall.
- Let your arms rest at your sides.
- Stay for 5–15 minutes, breathing deeply.
- Slowly bend your knees and roll over to one side.
- Take a rest and get up gently.
Viparita Karani Benefits
- Releases fatigue and lowers body heat
- Improvement in circulation reduces leg swelling
- Eases stress and offers sound sleep
Viparita Karani Cons
- Avoid those with lower back issues
- Not recommended for females during menstruation
Also Read: Yoga for Pitta
D. Balasana (Child’s Pose)
Steps
- Kneel on the mat, big toes touching.
- Keep your knees wide apart.
- Sit back on your heels.
- Come to the table pose.
- Exhale and lower your hips to the heels.
- Lower your forehead on the mat.
- Keep your knees in a comfortable position.
- Stretch your arms in front, stacked under the forehead or alongside your body.
- Breathing slowly, hold for 1–3 minutes.
- Slowly inhale up, release, and get back to a seated position.
Balasana Benefits
- Calms the mind by minimizing heat-related stress
- Smooth back and hip stretching
- Promotes deep, cooling breaths
Balasana Cons
- Avoid those with knee problems
- Don’t practice after eating, as it compresses the abdomen
E. Ardha Matsyendrasana (Half Lord of the Fishes Pose)

Steps
- Sit with legs extended on a mat.
- Take your right foot across your left knee.
- Place your right hand behind for support.
- Inhale and raise the left arm.
- Slowly twist and place your left hand on the foot.
- Bend your elbow and place your hand on your right shoulder (if you can’t touch the foot).
- Inhale to stretch, exhale to twist. Hold for 30 seconds and switch sides.
- In one sitting, practice it for only 2 to 3 minutes
Ardha Matsyendrasana Benefits
- Reduces excess body heat
- Develops spinal flexibility
- Purifies the internal organs and promotes digestion
Ardha Matsyendrasana Cons
- Demanding for beginners
- Avoid during pregnancy and those with back issues
Conclusion
This summer, stay cool with these 5 Yoga Poses to beat the heat and feel relaxed and energized. Along with these Yoga Poses, always stay hydrated, stay out of direct sun exposure, and maintain a healthy lifestyle and eating habits. Listen to your body and adjust to your comfort while practicing yoga poses. Take rest, stay hydrated, and don’t practice under stress or hurry. Incorporate this natural practice to start a cool, healthy, and balanced life.
Written By: Anjali B
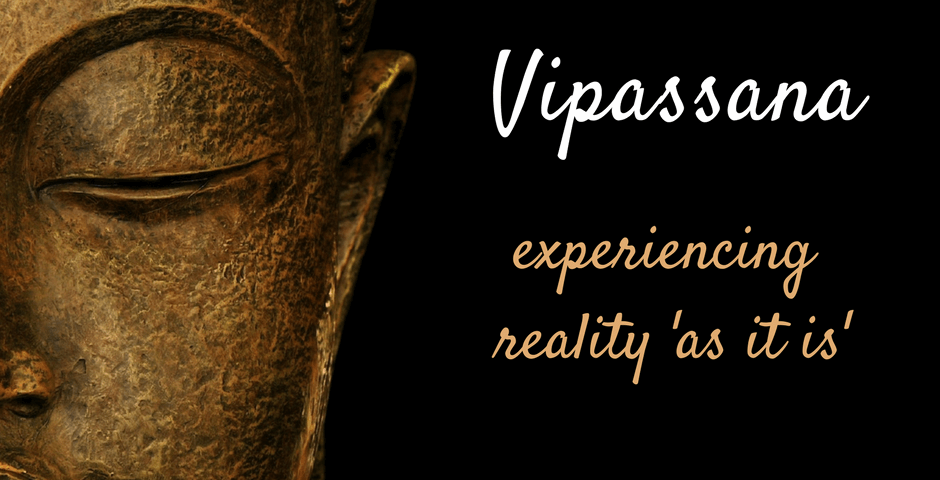
Practicing Silence with Vipassana
Today’s fast-paced world is driving everyone crazy. There is no stillness, and finding a silent place or enjoying silence is quite tough. Meditation is one of the best practices to attain silence, and among them, Vipassana Meditation is considered ideal. Vipassana, inspired by the Buddha’s teachings, encourages us to observe our inner world without judgment or attachment, calmly. Practicing Silence with Vipassana takes one on a beautiful and rewarding journey of self-awareness that kindles to self-discovery. The inward journey to stillness to find clarity, peace, and ultimately to the path of enlightenment. The self-transformation journey requires daily practice, healthy eating, and sleeping habits, and mindfulness in every activity. Moreover, Vipassana strengthens the self-transformation journey as individuals come to self-discovery, creating discipline in their habits of daily practice, eating, sleeping, and mindfulness.
What is Vipassana?
Vipassana is derived from a Pali word, where Vi = Clear and Passanā = ‘to see’, which simply translates to ‘to see things as they are’. Vipassana was rediscovered by Gautama Buddha over 2,500 years ago. Today, it is practiced as an ancient meditation technique and is still relevant, which leads to spiritual liberation. Vipassana teaches us to observe our thoughts, emotions, and physical sensations as it is. Through this, it guides to attain self-awareness, mindfulness, and inner peace.
Also Read: What is Vipassana Meditation?
The Role of Silence in Vipassana
Silence plays a vital role in Vipassana practice as it creates a quiet environment. The environment is free of external conversation or any distractions, allowing insight to naturally rise. The quiet environment brings the practitioners’ minds inward. Silence fosters awareness, concentration, and introspection, creating the deeper mental patterns to come to the surface. Self-silence becomes the gateway to self-discovery, which helps for true understanding and creates a path for transformation.
Benefits of Practicing Silence with Vipassana
- Mental clarity and calmness
- Emotional balance and reduced reactivity
- Self-discovery and deep self-awareness
- Disinterest in ego-driven or unnecessary desires
- Better compassion and understanding
Vipassana and Enlightenment
Enlightenment doesn’t come from escaping life, but from seeing it as it is. Vipassana brings hidden truths into focus; however, attaining enlightenment in Vipassana is not a sudden insight. The process unfolds layer by layer, bringing clarity with consistent practice. Firstly, people must come to experience dukkha (suffering), anicca (impermanence), and anatta (non-self) practically. Only through a deep realization of these experiences, the mind become free and guided to the path of enlightenment.
How to start Vipassana
Start practicing daily silent sitting for 10–15 minutes a day. Slowly increase the time.
Attend a 10-day retreat at the Vipassana retreat centers.
To learn more about Vipassana, read books by renowned teachers such as The Art of Living: Vipassana Meditation as Taught by S.N. Goenka, by William Hart, Mindfulness in Plain English by Bhante Henepola Gunaratana, Vipassana and the Scientific Worldview, by Paul R Fleischman, etc.
Furthermore, learn through visual learning- watch videos and talks on Vipassana, such as S.N. Goenka’s introductory talks (YouTube or Dhamma.org).
Develop a daily practice after attending retreats for deep transformation and attaining mental peace and enlightenment.
How Vipassana Works
Vipassana is simply a non-religious practice grounded in ethical living (Sīla), mental discipline (Samādhi), and wisdom (Paññā). Vipassana retreat generally follows a strict daily schedule, including:
Mindful breathing (Anapana) to focus the mind.
Body scanning to develop awareness of physical sensations.
Understanding impermanence (anicca or anitya) allows the mind to detach from desire and hatred.
Silence to lessen distraction and deepen inner observation.
Final Thoughts
In a society that is keen on speaking out, Vipassana invites us to turn inward and listen. To observe without reacting, to sit in silence and discover the depth of our being. Through self-silence, we don’t escape the world, but we understand it ‘as it is’. Practicing Silence with Vipassana transforms our relationship with suffering, and in that transformation, we find the seeds of freedom.
Written By: Anjali B
Mudras for Calming the Mind
Inner peace and a calm mind are tough to experience in this present hectic world. It has become a great necessity to soothe a restless mind and body. People use different methods for calming the mind and attaining inner peace. One of the easiest yet most effective proven methods is using various mudras while practicing meditation. These simple methods are easy to use and have barely any side effects. Hence, we present a blog on Mudras for calming the mind to use during meditation to attain energy flows within the body. We also further explore how to do the different mudras (hand gestures) practices, their benefits, and potential side effects. The best part of practicing these mudras is that you can use them anywhere, at any time, for calming the mind.
What Are Mudras?
In a simple word, Mudras are a combination of subtle physical movements. It alters mood and perception, further enhancing concentration and awareness. Mudra translates to ‘gesture’ or ‘an attitude’. Furthermore, it is described as psychic, emotional, devotional, or aesthetic gestures. Seal, short-circuit, or circuit-by-pass are some other defining terms for Mudra. In yoga and meditation, mudras help to influence the flow of energy (prana) and stimulate different parts of the body and mind.
Types of Mudra Techniques
Normally, we classify them as two Mudra techniques:
- Simple Hand Positions
- Whole-body combination (asana, pranayama, bandha, and visualization)
5 Mudras for Calming the Mind
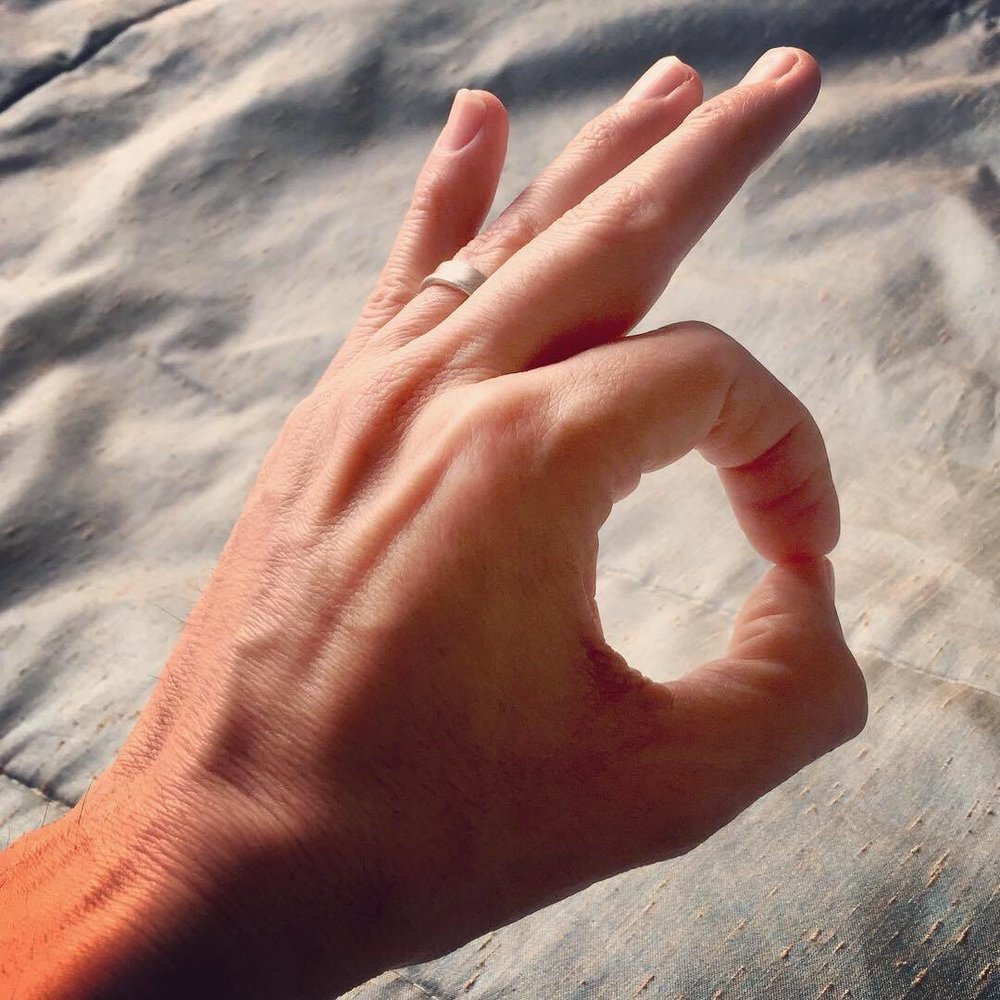
Gyan Mudra | Mudra of Knowledge
An essential, widely practiced Science mudra symbolizes the mind and brain union. It is also known as Saraswati Mudra.
Popular as: Chin Mudra
Combination Element: Air and Fire
Fingers used: Index finger and Thumb
Activates: Sahasrara (Crown Chakra)
Steps:
- Sit comfortably in a Lotus pose with a straight spine.
- Join the tip of the index finger to the tip of the thumb.
- Keep the other three fingers straight and relaxed.
- Place hands on knees, palms facing up.
- Relax and meditate for a few minutes.
Gyan Mudra Benefits
- Activates different brain glands (Pineal, Pituitary, and Hypothalamus)
- Creates energetic balance between the mind and the body
- Improves memory and concentration, promoting intellect
- Calms the mind, overcomes addictions, and boosts positive thoughts
- Improves intuition as it activates the third-eye chakra
- Reduces anxiety symptoms and promotes emotional balance
- Excellent stress buster to help release hypertension, heart disease, insomnia, etc.
Gyan Mudra Side Effects
- Rarely any, but avoid using by overthinkers
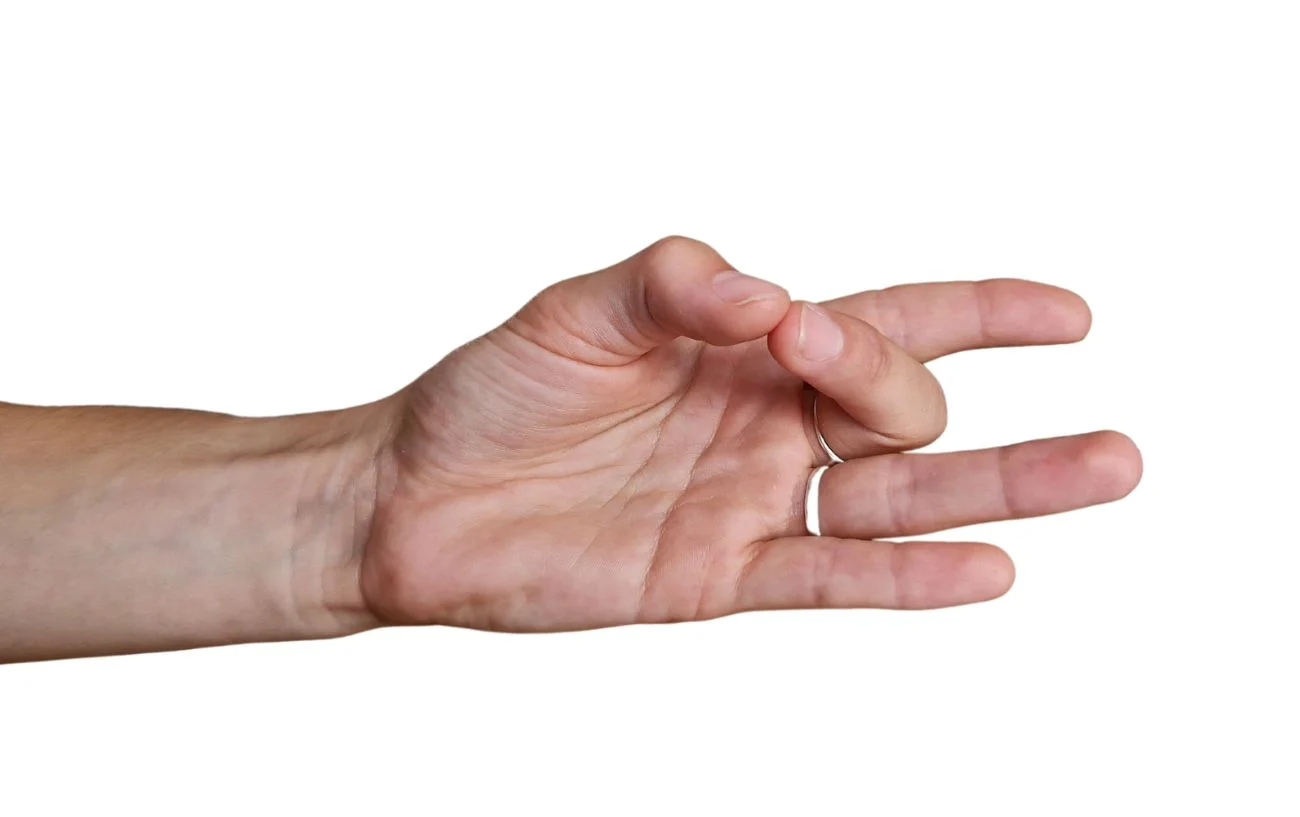
Shuni Mudra | Mudra of Patience
A vital mudra for overthinkers, which helps to make people stay focused in the present and increases concentration. It reinforces the air and fire elements in the body.
Popular as: Saturn Mudra
Combination Element: Space and Fire
Fingers used: Middle finger and Thumb
Activates: Manipura (Solar Plexus Chakra)
Steps:
- Sit relaxed in padmasana (lotus pose) or any comfortable asana.
- Join the top of the middle finger to the tip of the thumb.
- Keep the remaining fingers straight.
- Rest your hands facing up on your knees.
- Close your eyes and meditate for a few minutes.
Shuni Mudra Benefits
- Encourages patience, discipline, and compassion
- Activates sensory and intuition powers
- Purifies the mind and the body
- Good for digestion, increases metabolism
- Calms the mind, reducing impulsivity and stress
- Healthy, glowing skin and clear eyes
- Boosts will power and confidence
Shuni Mudra Side Effects
- Avoid when feeling emotionally overwhelmed
Prana Mudra | Mudra of Life Force
The powerful mudra is the union of water, fire, and air elements, which is the combination of Prithvi and Indra tattva mudras. Regular practice of Prana mudra creates a reservoir in the body and regulates the prana vayu in the body.
Popular as: Vital Energy Mudra
Combination Element: Earth, Water, and Fire
Fingers used: Ring finger, Little finger, and Thumb
Activates: Muladhara (Root Chakra) and Anahata (Heart Chakra)
Steps:
- Sit comfortably in cross-legged or lotus pose with your spine straight.
- Join the tip of the ring and little finger to the tip of the thumb.
- Keep your index and middle fingers straight.
- Rest your hands on your knees, palms facing upward.
- Relax and meditate for a few minutes.
Prana Mudra Benefits
- Enhance mental clarity by improving memory and concentration
- Reduce fatigue and rejuvenate the body
- Strengthen the immune system and vitality
- Clean out blood vessels, arteries, and veins
- Relief from respiratory diseases
- Effective mudra for the heart and lungs
- Good for curing eye diseases (dry eyes, red eyes, etc.)
Prana Mudra Side Effects
- Avoid if you have hypertension issues, and during pregnancy
Dhyana Mudra | Mudra of Meditation
A very significant mudra that energizes the Pran Shakti. It creates a balance and harmony between all 5 elements in the body. It is also known as Brahmanjali Mudra.
Popular as: Samadhi Mudra
Combination Element: Air
Fingers used: Thumb
Activates: Sahasrara (Crown Chakra) and Ajna (Third Eye Chakra)
Steps:
- Sit comfortably with straight posture.
- Place your left hand on your lap, facing upward.
- Place the back of the right hand over the left, facing up.
- Slowly touch the tips of both thumbs, forming a triangle shape.
- Close your eyes, relax, and meditate in this mudra for a few minutes.
Dhyana Mudra Benefits
- Calms the mind, minimizing hyperactive thoughts
- Improves concentration powers
- Proper heart functioning regulates palpitations
- Helps to maintain a balance for both low and high pressure
- Calms the nervous system, helping to reduce stress, fear, etc.
- Proper balance between both right and left brain
- Supports in awakening the conscious and spiritual level
Dhyana Mudra Side Effects
- Sitting in the same posture for a longer period may cause pain in the legs
Apana Vayu Mudra | Heart Calming Mudra
The perfect mudra for a healthy heart is a combination of apana (downward flowing energy) and vayu (air). It is also known as a “first aid” mudra during panic or stress attacks.
Popular as: Mritsanjeevani Mudra
Combination Element: Earth, Space, and Fire
Fingers used: Ring finger, Middle finger, and Thumb
Activates: Anahata (Heart Chakra) and Muladhara (Root Chakra)
Steps:
- Sit in a Padmasana or any comfortable asana.
- Curl your index finger into the base of the thumb.
- Join the tips of the middle and ring fingers with the tip of the thumb.
- Keep the little finger straight.
- Rest the palm facing up on your knees.
- Relax and start to meditate for a few minutes.
Apana Vayu Mudra Benefits
- Proper heart functioning with regulatory circulation
- Improves digestive issues
- Reduces mental tension and anxiety issues
- Calms the mind, promoting mental clarity
- Develops emotional balance by releasing fear
- Boost stability and harmony within the body
- Clear energetic blockages in the chest and abdominal areas
Apana Vayu Mudra Side Effects
- Not recommended for certain heart conditions or low blood pressure
Conclusion
Mudras are simple tools for calming the mind. The right use of mudras while practicing meditation brings mental clarity and emotional balance. Incorporate mudras in your daily meditation routine or practice if you are feeling stressed or dealing with emotional turmoil. Practice daily with mudras, start small, and stay consistent. Gradually, a positive effect on the mind, body, and soul is visible. As a result, experience the calming mind and mental clarity with overall energetic balance.
Frequently Asked Questions (FAQs)
How long should you practice the Mudras?
It is ideal to practice each mudra for 5 to 15 minutes.
When to practice?
You can practice daily during meditation in a mindful state or when feeling stressed or overwhelmed.
How to practice it?
You can just sit in a comfortable position and practice. You can also combine mudras with deep breathing or mantras for greater effect.
Are there any precautions and side effects?
Don’t overdo it to maintain a balance and good flow of energy.
When not to practice the Mudras?
If you are not feeling well, highly energized, or overly mentally distressed, don’t practice the mudras.
Written By: Anjali B
Top 7 Yoga Asanas for Weight Loss and Fighting Obesity
Yoga is slowly gaining popularity, which is resulting in it becoming a fundamental part of human beings’ lives. In the present world, health is deteriorating physically, mentally, and spiritually due to our hectic schedules and busy lives. A busy schedule is leading for an individual to unhealthy eating and sleeping habits. As a result, there is a rapid growth in obesity and weight gain among the people. Indeed, it has become a serious global issue. Many people have followed different ways to lose their weight and fight obesity. Among several ways, practicing Yoga has proven a boon and one of the safest natural methods. Therefore, we present the top 7 yoga asanas for weight loss and fighting obesity to incorporate in your daily life to reduce stress, improve metabolism, burn fats, and enhance overall body function. It contributes to a sustainable and balanced approach to weight management.
Below, we have listed 7 beneficial yoga asanas for weight loss and fighting obesity, each with its steps, benefits, and side effects.
Top 7 Yoga Asanas for Weight Loss and Fighting Obesity
A. Vajrasana (Thunderbolt Pose)
Vajrasana is an asana where your body posture involves sitting on the knees with the calves underneath the thighs. It is also popular as the Thunderbolt or Diamond pose. This asana is derived from the Sanskrit word ‘Vajra,’ which translates to thunderbolt. There is a variety of asanas described under Vajarsana in ancient texts. In hatha yoga, it is a kneeling asana.
Steps
- Kneel on the mat, and put your toes together and heels apart.
- Rest on the balls of your feet and place the gap in between your heels.
- Set your hands in Jnana or Chin Mudra and place them on the knees.
- Keep your back straight and close your eyes.
- Hold for 30 seconds to a few minutes, focusing on deep and sound breathing.
- Slowly come out of this pose by sitting back and lengthening your legs straight out in front of you to release.
Vajrasana Benefits
- Reduces stress and calms the mind
- Aids digestion after meals
- Reduces bloating, supports weight loss
- Strengthens the lower body with regular practice
Vajrasana Side Effects
- Avoid if you have knee or ankle ligament injuries
- People with severe arthritis, ulcers, or hernia mustn’t attempt
B. Surya Namaskar (Sun Salutation) Asana Series
Surya Namaskar is a flowing sequence of 12 asanas that synchronizes with breathing. It is a complete exercise for the whole body. It is also known as the Sun Salutation or Salute to the Sun. For spiritual connections, many practitioners chant mantras along with each asana.
Steps
Stand in front of the mat.
Sthita Prarthanasana (Standing Prayer Asana): Stand straight, keeping your head straight and shoulder relaxed. Join your hands in Anjali mudra at the heart center. Compose yourself and take a deep breath.
Hasta Uttanasana (Raised Arm Asana): Inhale and raise both your arms above your head and bend back slightly.
Hasta Padasana (Hands to Toe Asana): Exhale and bend forward slowly to touch your toes or feet with your hands.
Ashwa Sanchalanasana (Equestrian Asana): Inhale and take your right leg back. Keep your left leg bent at 90 degrees and hands on the ground. Arch your spine and face upward.
Adhomukha Shvanasana (Downward Dog Asana): Exhale and step your left leg beside the right. At the same time, lift your hips into an inverted V-shape, bringing your head in between your arms.
Ashtanga namaskar (Eight-limb Asana): Retain your breath and lower your knees, chest, and chin to the mat. Keep your hips slightly raised.
Urdhvamukha Shvanasana (Upward Dog Asana): Inhale and slide forward, lifting the head from the ground. Keep your chest and lower body on the ground and look upward.
Repeat the asanas from 1 to 5 in reverse order.
Adhomukha Shvanasana (Downward Dog Asana): Exhale and slowly raise your hips upward. Form your hips into an inverted V-shape, bringing your head in between your arms.
Ashwa Sanchalanasana (Equestrian Asana): Inhale and bring your right foot forward, placing both hands on the ground. Lift the chest and stare forward.
Hastapadasana (Hands to Leg Asana): Exhale and bring both legs together with head in.
Talasana (Raised Arm Asana): Inhale and come back straight. Raise both arms overhead, lengthening the spine.
Sthita Prarthanasana (Standing Prayer Asana): Exhale and bring hands back to the heart center in Anjali mudra. Return to the standing prayer position, composed and balanced.
Repeat the same 12 asanas with another leg to complete one round. (Only perform as your will and stamina allow.)
Surya Namaskar Benefits
- Calories and fat burns with a full-body workout
- Improves posture and balance
- Promotes mental clarity and focus
- Boosts energy and circulation
- Enhances flexibility and strength
Surya Namaskar Side Effects
- Overdoing is restricted
- Rapid practice causes dizziness or fatigue
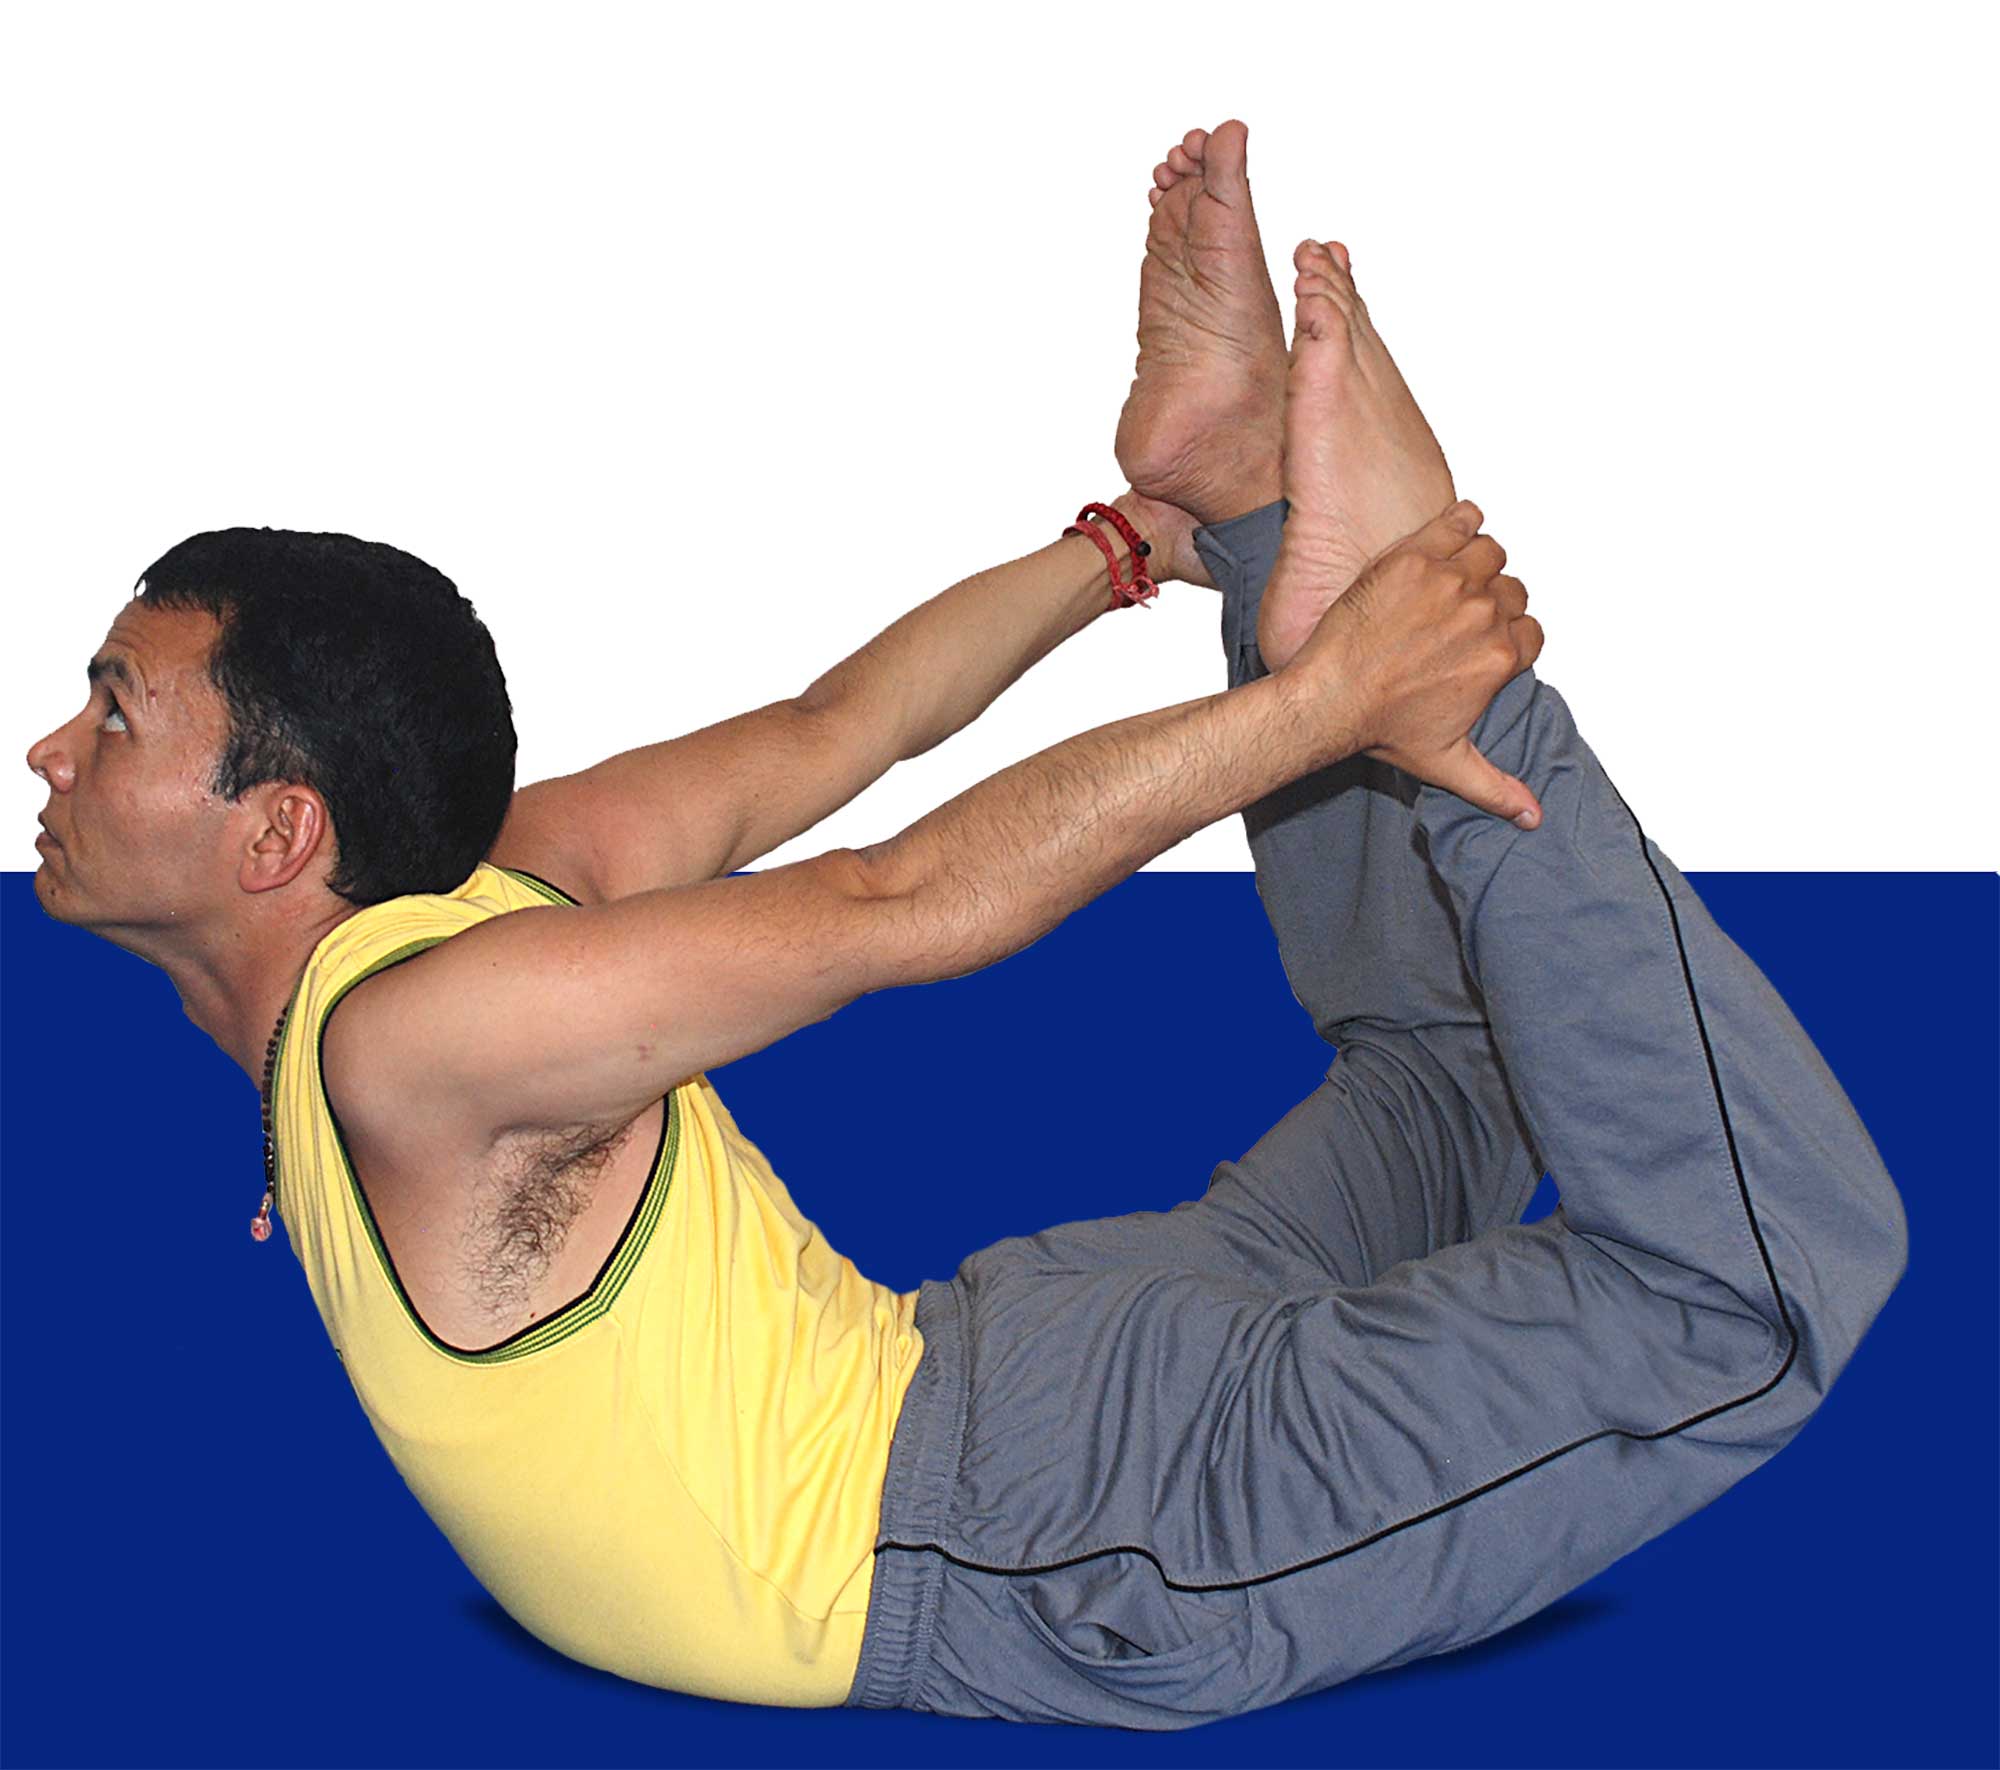
C. Naukasana (Boat Pose)
Naukasana is an asana where your body forms a “V” shape or a boat shape while balancing on your sit bones, lifting your legs and arms. Hence, it is also called a Boat pose. This asana is derived from the Sanskrit word paripūrṇa, which means boat. The other names for this asana are Navasana or Paripūrṇanāvāsana.
Steps
- Sit on the mat with your legs extended straight and your feet together.
- Bend your knees and lean your torso back.
- Extend your arms in front of you and gently raise both legs.
- Keep your thighs at a 45-degree angle and your arms parallel to the floor.
- Stay in the Boat Pose, forming a “V” shape with your body.
- Gaze at the toes or nose for as long as you can, breathing deeply.
- Release the pose, straighten your legs, and relax.
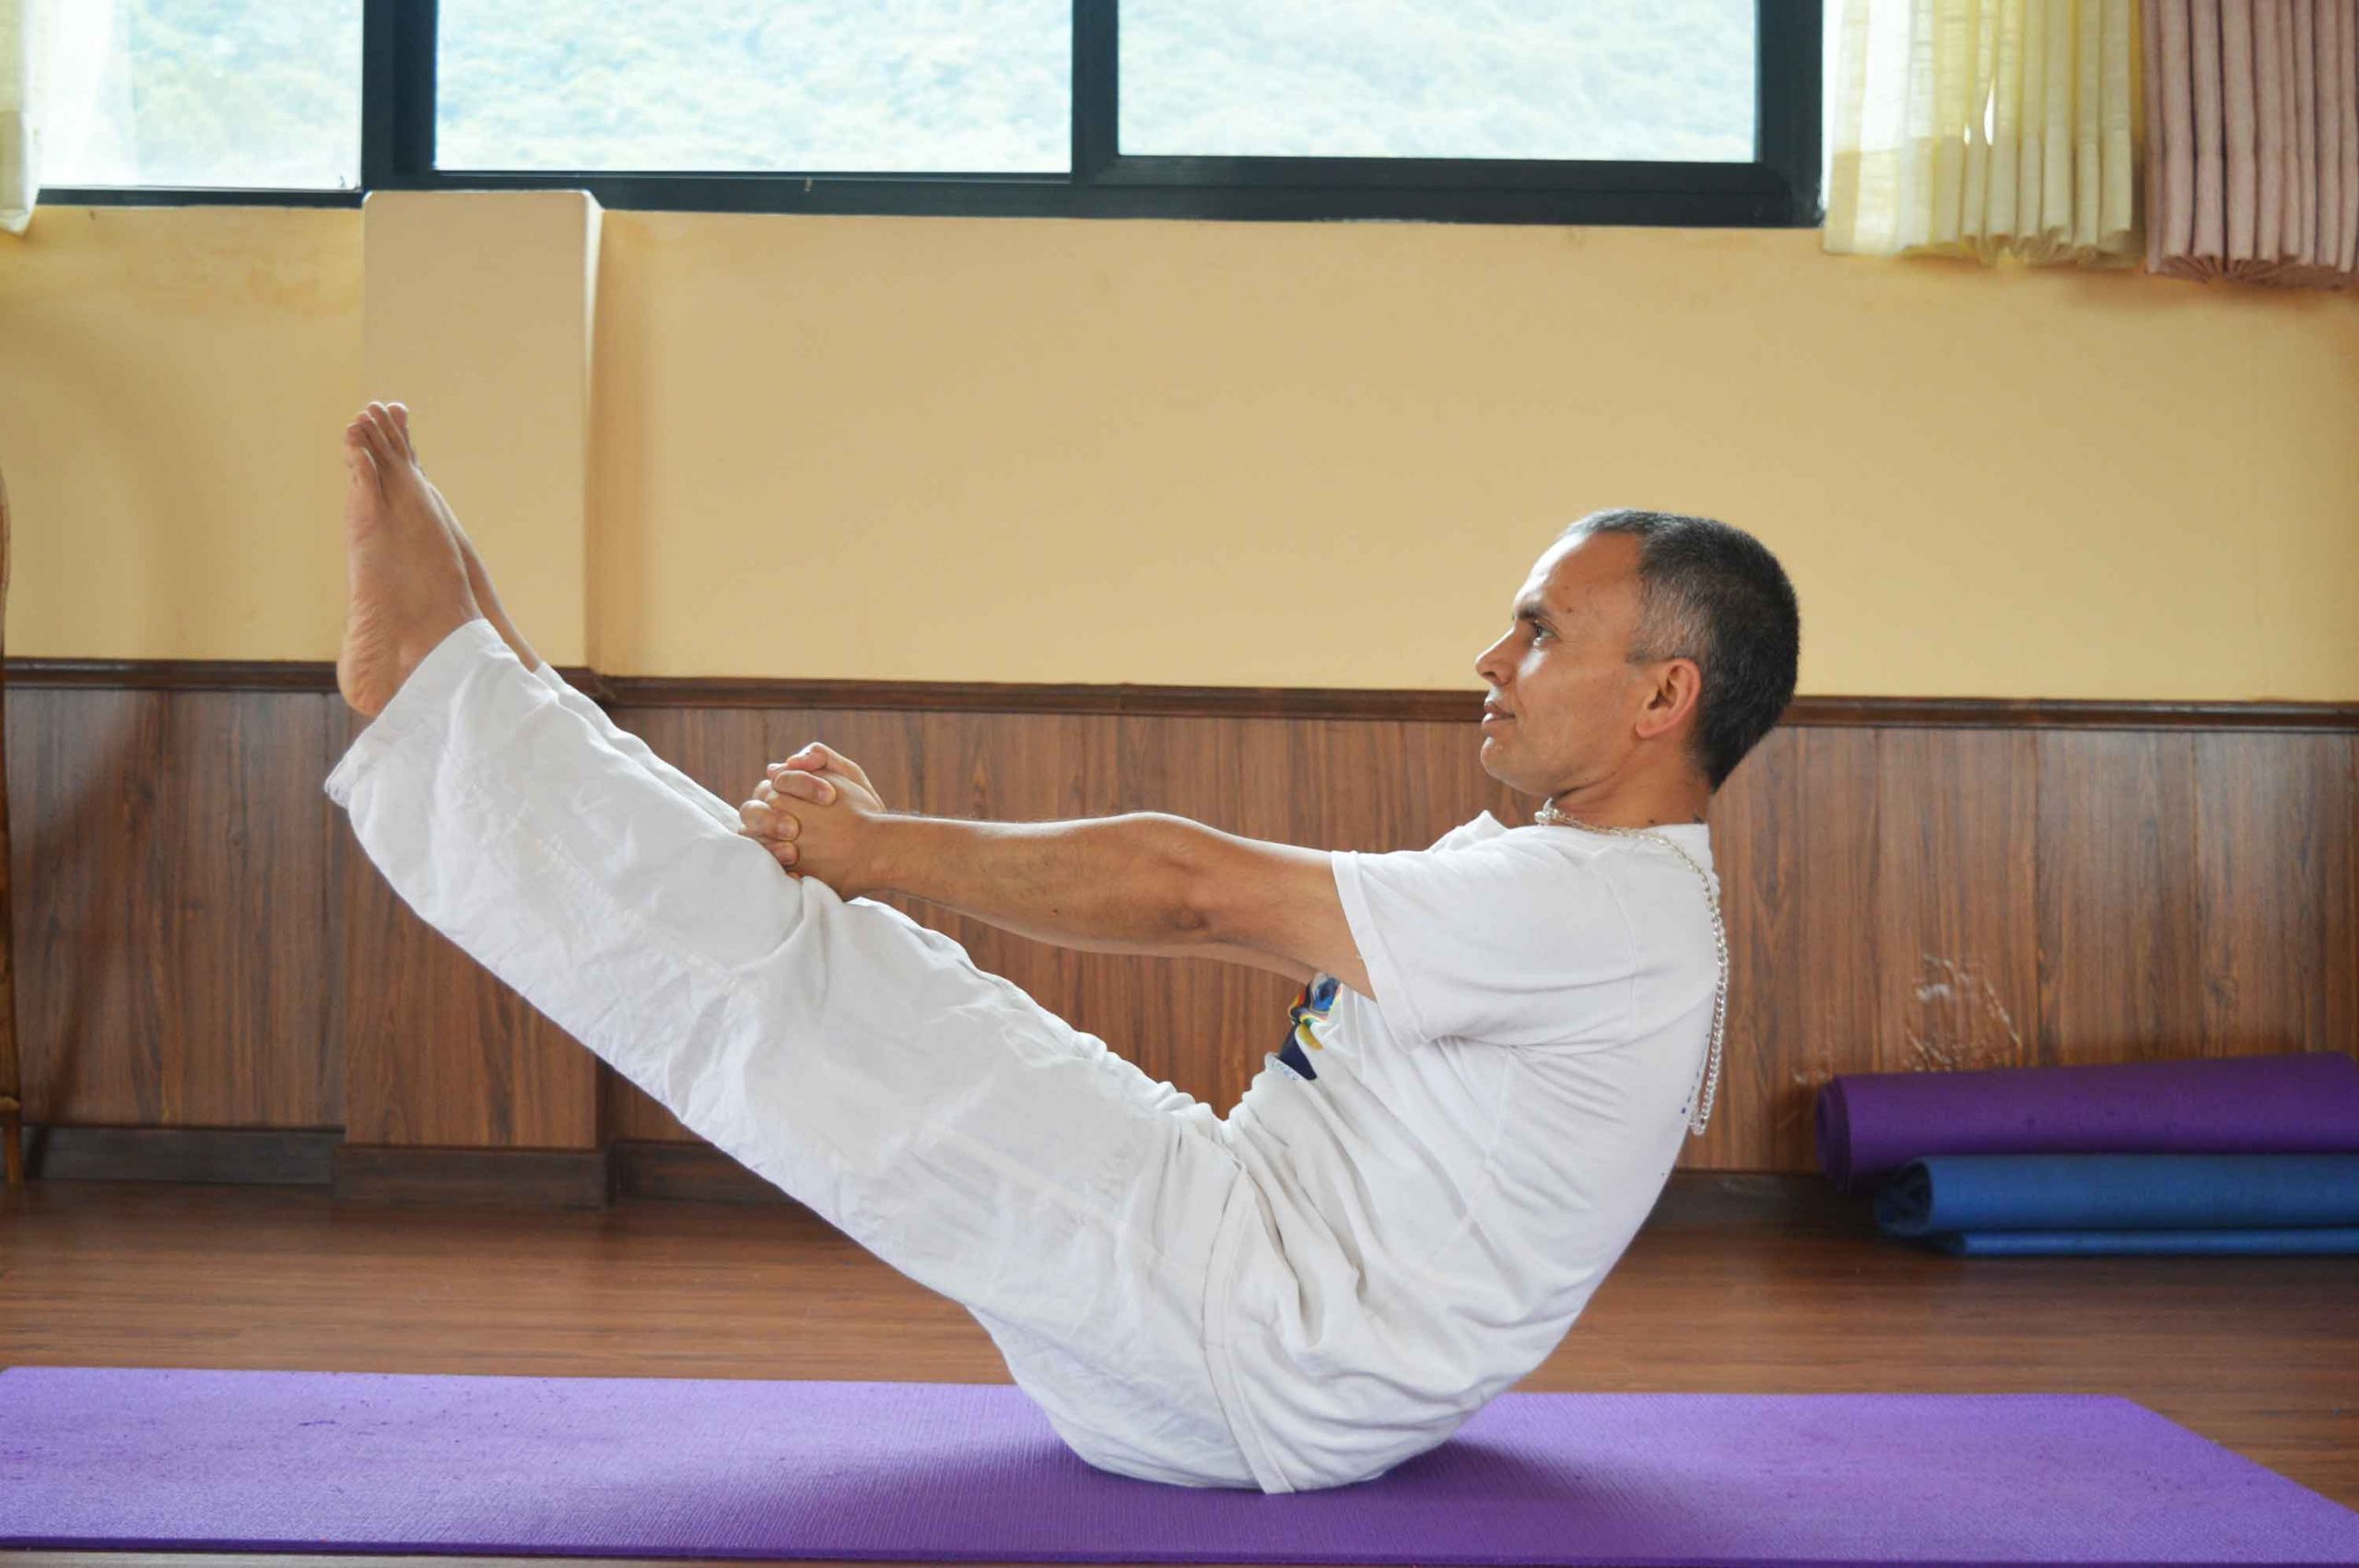
Naukasana Benefits
- Improves our digestive and reproductive systems
- Burns belly fat and strengthens the Body Muscles
- Make stronger abs, hips, and lower back
- Calms Mind and releases stress
- Improves focus and concentration
Naukasana Side Effects
- Overstretching may strain the lower back or hips
- Improper head alignment causes neck injury
D. Dhanurasana (Bow Pose)
Dhanurasana is an asana where the body posture creates a bow-like shape. This asana is derived from the Sanskrit word ‘dhanur’ which translates bow. Thus, it is also called the Bow pose. It is described as a back-bending asana in hatha yoga
Steps
- Lie flat on your stomach with your legs bent, bringing your ankles toward your buttocks.
- Reach back and hold your ankles with your hands as you inhale.
- Arch the back, lifting the thighs, chest, and head together, and exhale.
- Lift your gaze and raise your feet.
- Carefully bring your ankles close to your buttocks.
- Stretch your arms and hold your ankles, and breathe.
- Make sure you balance on your stomach.
- Exhale, and slowly come back to the ground.
- Lower the head, chest, and legs, and relax.
Dhanurasana Benefits
- Decreases Abdominal Fat
- Better Digestion
- Cure for Fatigue
- Activates Manipura Chakra
- Flexible Hip Joints
Dhanurasana Side Effects
- Avoid during pregnancy, high or low blood pressure, and with abdominal surgeries
- Don’t practice if you have neck injury, lower back concerns, hernia, and migraine headaches
E. Trikonasana (Triangle Pose)
Trikonasana is an asana where the body parts: hands, legs, and backbone form a triangle shape. Hence, it is also called the Triangle pose. This asana is derived from the Sanskrit word Utthita Trikonasana (Extended Triangle Pose). Baddha Trikonasana (bound triangle pose) and Parivrtta Trikonasana (revolved triangle pose) are its variations.
Steps
- Stand straight on the mat with medium stance (about 3 to 4 feet).
- Inhale and stretch your arms at shoulder level.
- Rotate your right foot out 90 degrees and left foot in by 15 degrees and exhale.
- Place your right hand on your right shin bone.
- Raise your left hand upward and gaze at your left thumb.
- Keep taking long, deep breaths.
- Inhale, bend the right knee, and resume the standing position.
- Repeat the same process facing right or using left side.
Trikonasana Benefits
- Stretches the legs, hips, and spine
- Fat loss around the waist and thighs
- Balance and coordination improves
- Stimulates digestion and relieves stress
- Opens the chest and promotes deep breathing
Trikonasana Side Effects
- Incorrect alignment causes strain to the lower back, hamstrings, or neck
- Overextension is avoided, especially with tight hips or legs
F. Bhujangasana (Cobra Pose)
Bhujangasana is an asana where the upper part of your body is elevated above the ground same as a Cobra raising its hood. Therefore, it is also called the Cobra pose. It is classified as a reclining back-bending asana in hatha yoga.
Steps
- Lie down on your stomach and bring your chin to the mat.
- Place your palms under the shoulder and inhale.
- Lift your chest while your hips remain on the floor.
- Breathe, relax your shoulders down away from the ears
- Press your chest forward and exhale.
- Gently lower your chest and bring your chin to the mat.
- Rest your arms down by the sides and relax.
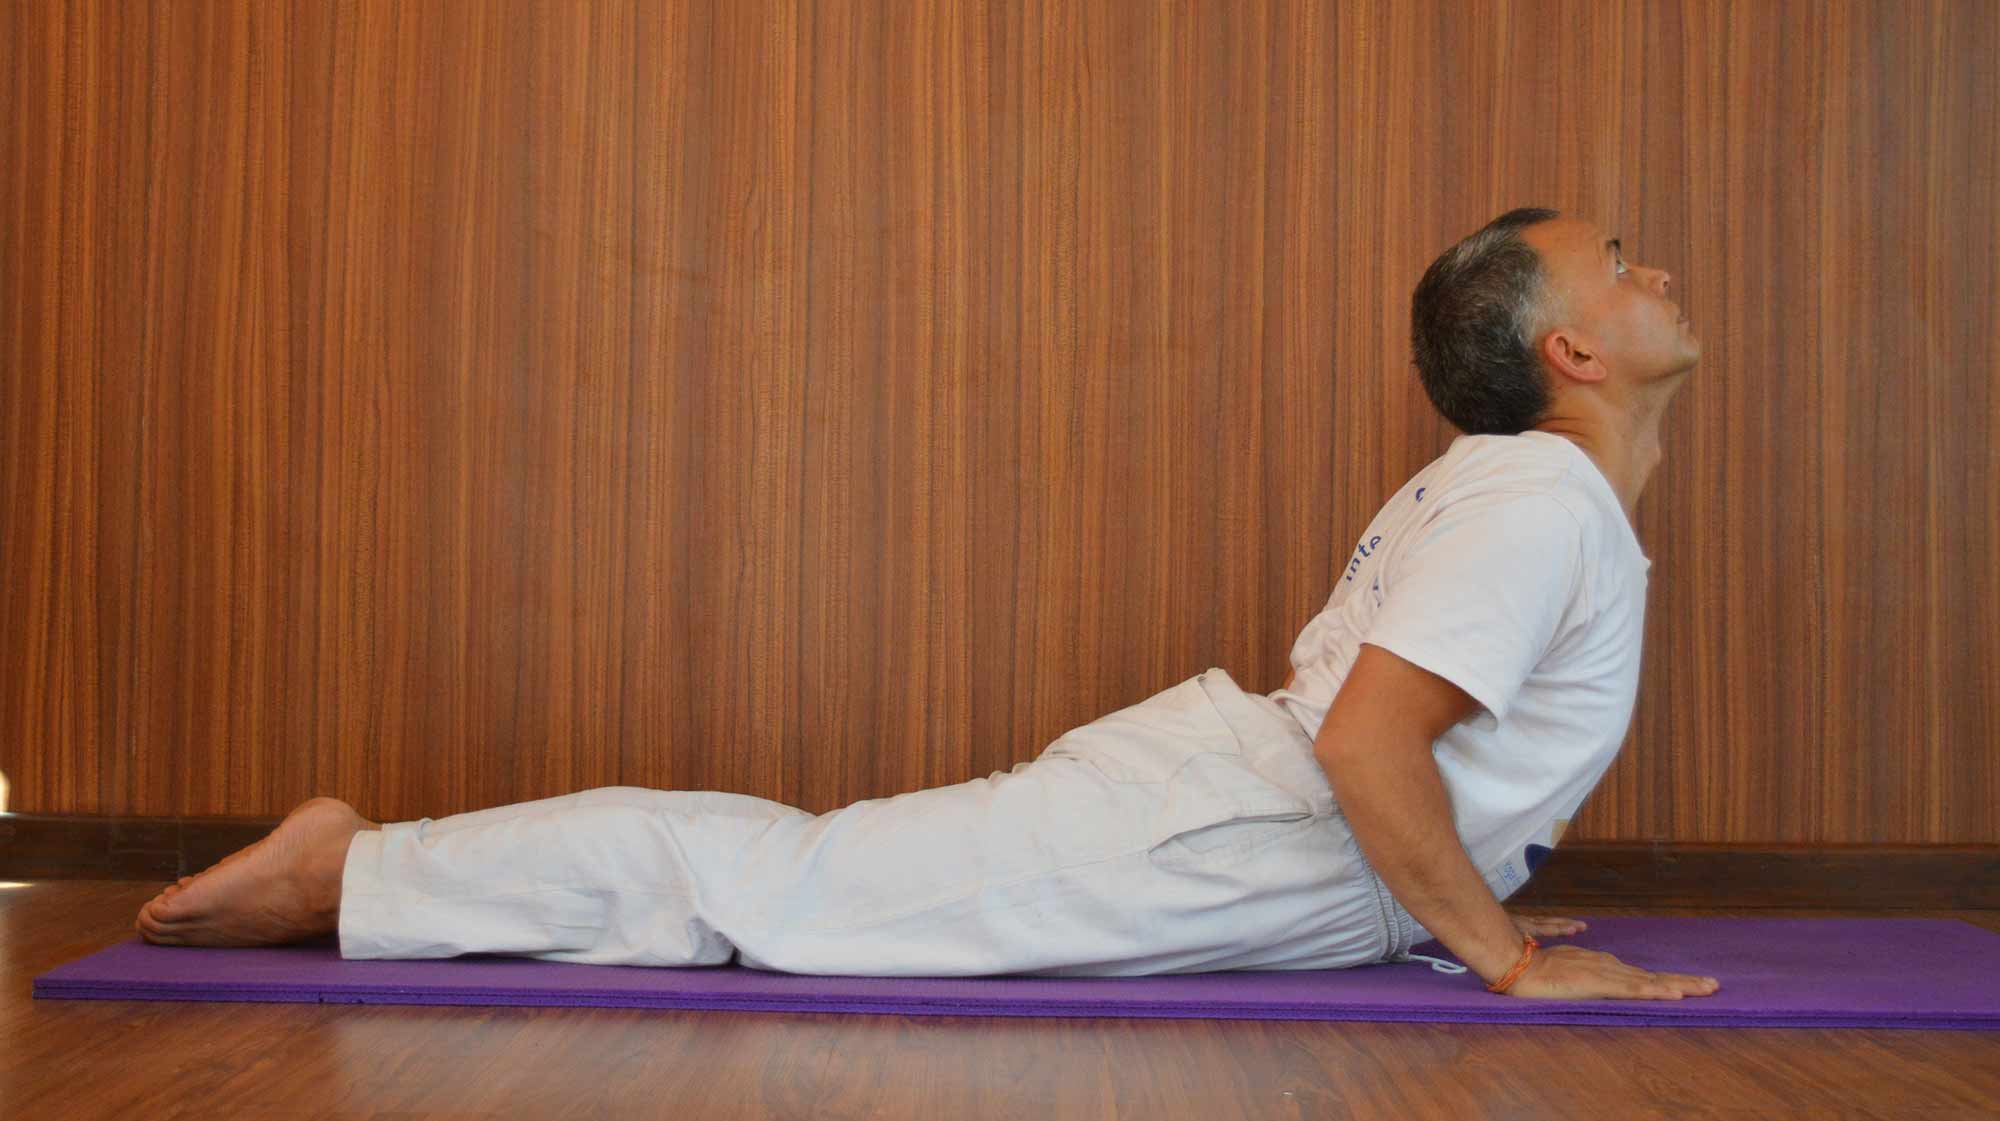
Bhujangasana Benefits
- Strengthens the spine, arms, and shoulders
- Regular practice burns belly fat
- Stimulates the heart and lungs, improving circulation
- Control in Menstrual and gynecological disorders
- Promoting better digestion and easing constipation
Bhujangasana Side Effects
- Avoid with spine issues or during pregnant
- Strictly restricted for hernia, peptic ulcer, hyperthyroidism, or intestinal tuberculosis patients
G. Setu Bandhanasana (Bridge Pose)
Setu Bandhanasana is an asana where the posture of your body becomes like a bridge. Thus, it is also popular as the Bridge pose. The full name of this asana is Setu Bandha Sarvāṅgāsana. In hatha yoga, it is an inverted back-bending asana.
Steps
- Lie on your back and join your legs.
- Bent your knees and bring heels nearer the buttock.
- Hold your ankles firmly and inhale.
- Slowly raise your buttocks.
- Trunk as high as you can to form a bridge.
- Stay comfortably in the pose for 15-30 seconds while breathing.
- Slowly exhale and return to the original position.
- Relax down on your back.
Setu Bandhanasana Benefits
- Tones the core, glutes, and thighs, helping burn fat
- Improves posture and opens rounded shoulders
- Improves digestion and thyroid glands
- Develop the female reproductive organs
- Reduces anxiety and insomnia
Setu Bandhanasana Side Effects
- Don’t practice during pregnancy or neck injury
- Patients with Hernia, Peptic or duodenal ulcers must avoid
Conclusion
These top 7 yoga asanas are not only beneficial for weight loss and fighting obesity but also promote the entire body and mind function. Practicing daily improves digestion, enhances metabolism, and builds up muscles. As a result, it helps burn fat, resulting in weight loss. Fighting obesity is a tough task, but with strong determination, discipline, and routine daily practice, it is achievable. So, start practicing these yoga asanas to stay fit and healthy.
Written By: Anjali B