16 Jun 2025 Himalayan Yoga Academy
Yoga practice among individuals is blooming, which is a good indication. It shows that people are taking their health seriously. The busy life and schedule are strongly impact the lives of an individual. Thus, people are practicing yoga as it helps to keep the mind, body, and soul in balance and in shape. To practice yoga, yoga poses are the foundation which gives you brief understanding of your yoga journey. Correct yoga poses offer a better experience and are also beneficial, especially for beginners. Hence, we present the 5 easiest standing yoga poses for beginners with their steps, benefits, and cons for a smooth yoga journey.
5 Easiest Standing Yoga Poses for Beginners
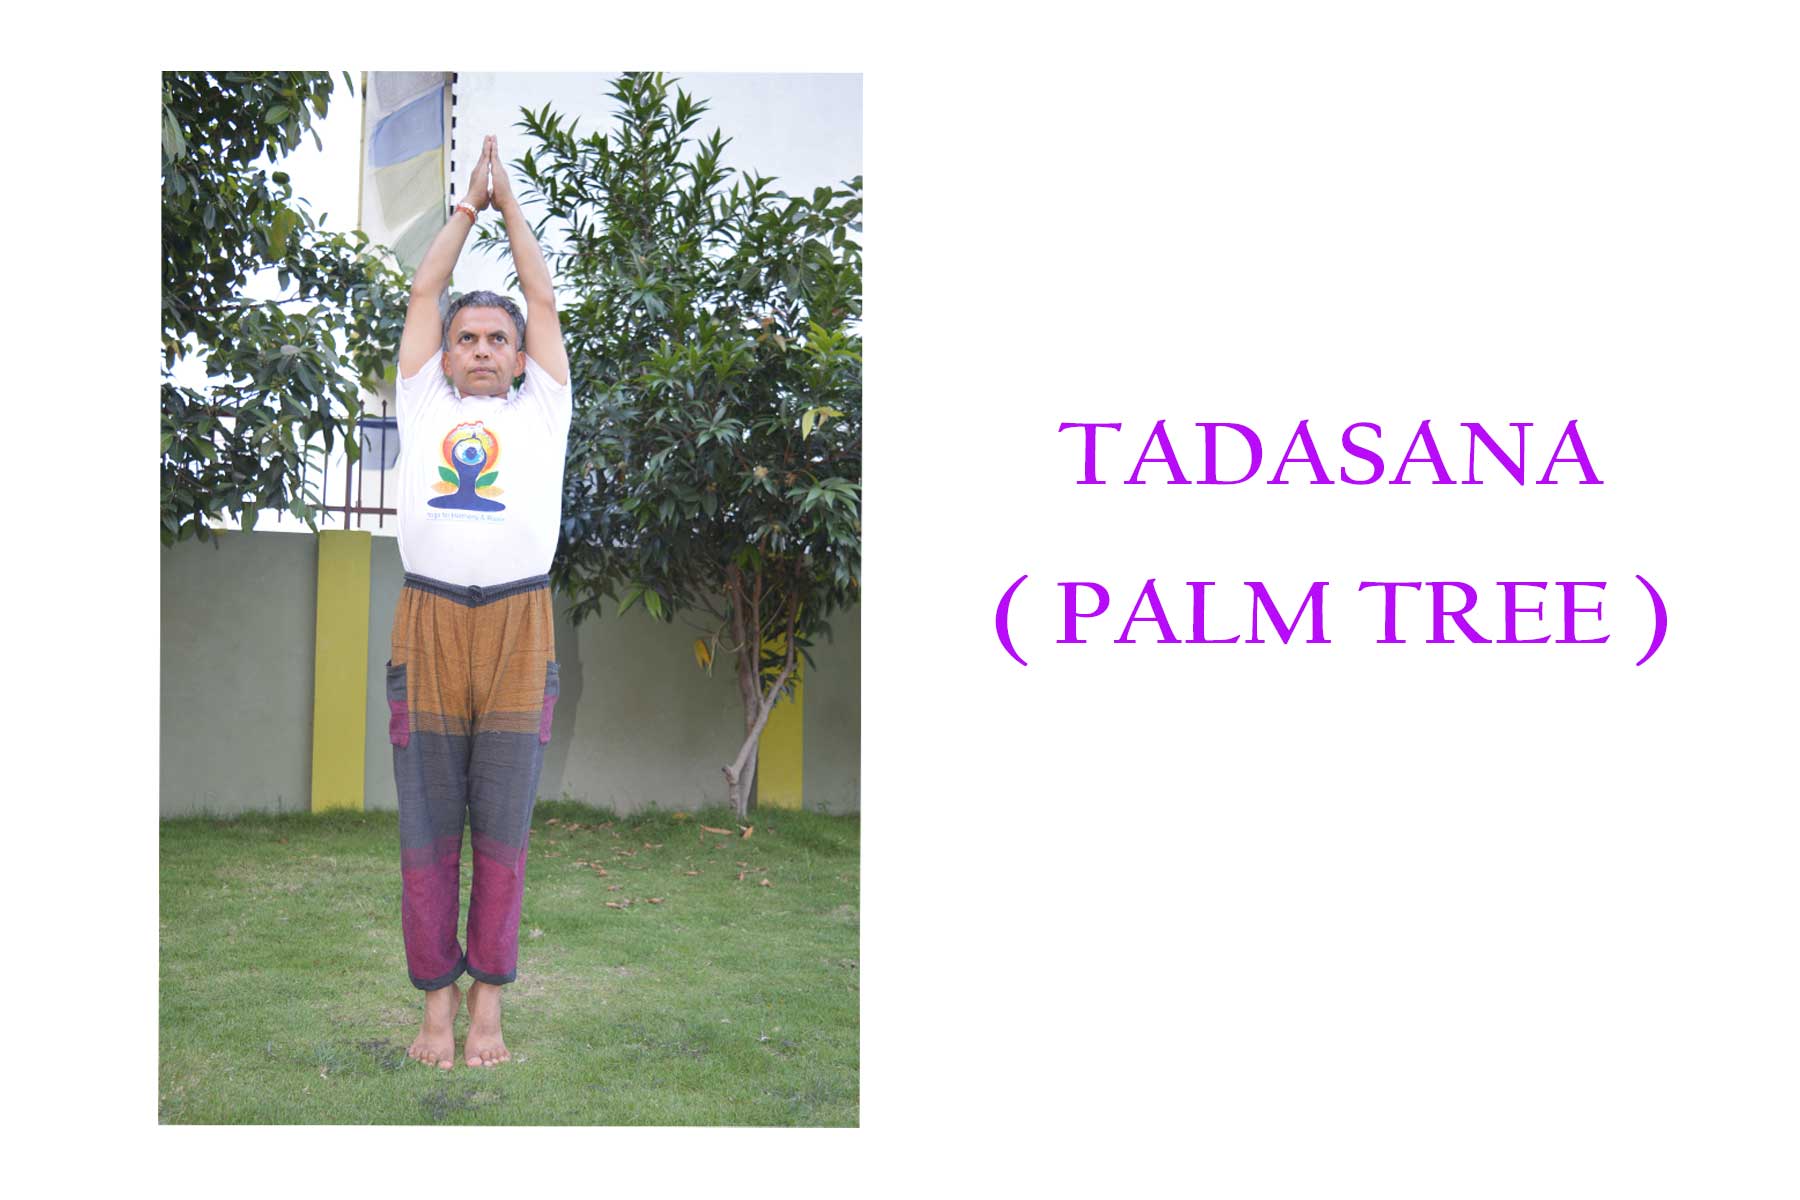
A. Tadasana (Mountain Pose)
Steps
- Stand on a mat with a straight-legged posture, the feet together, heels slightly apart, and wide-set toes.
- Draw your weight evenly into the body and slowly lift your kneecaps.
- Open your chest wide, straighten your spine, and keep your shoulders aligned over your hips.
- Stretch your hands straight up with palms facing forward.
- Tilt the crown of the head upwards without tilting the chin upwards but keeping it parallel to the ground.
- Remain in a steady pose for 15-30 seconds, breathing slowly.
- Bring your hands down and back into a normal standing position.
Tadasana Benefits
- Increases body awareness, promoting better balance and coordination
- Proper body alignment improves blood circulation and respiration
- Calms the mind and improves concentration, promoting mental focus
Tadasana Cons
- Avoid knee locking for those people who have knee problems
- Improper alignment of hips, feet, or shoulders causes strain in the lower back or knees
B. Vrikshasana (Tree Pose)
Steps
- Stand erect. Keep the feet together.
- Fold the right leg and placed it at the top of the left thighs with the toes of the right leg should point downwards.
- The right leg should perpendicular to the left leg.
- Extend your arms above your head.
- Inhale and try to make Namaskar mudra with your palms.
- Balance the pose as long as you can because balancing is of utmost importance in the Tree pose.
- Try to make your spine straight and feel the stretching from toes to fingers.
- With a deep exhale bring your arms and leg down.
- Repeat the same with the left leg. It completes one round.
- Do three-five rounds.

Vrikshasana Benefits
- Strengthen the bones of the hips and legs
- Calms and relaxes the central nervous system
- Helps to cure rheumatic pain and also treats numbness
Vrikshasana Cons
- Avoid people suffering from acute knee problems, Hip injury
- Avoid if you are suffering from migraine, insomnia, or low or high blood pressure
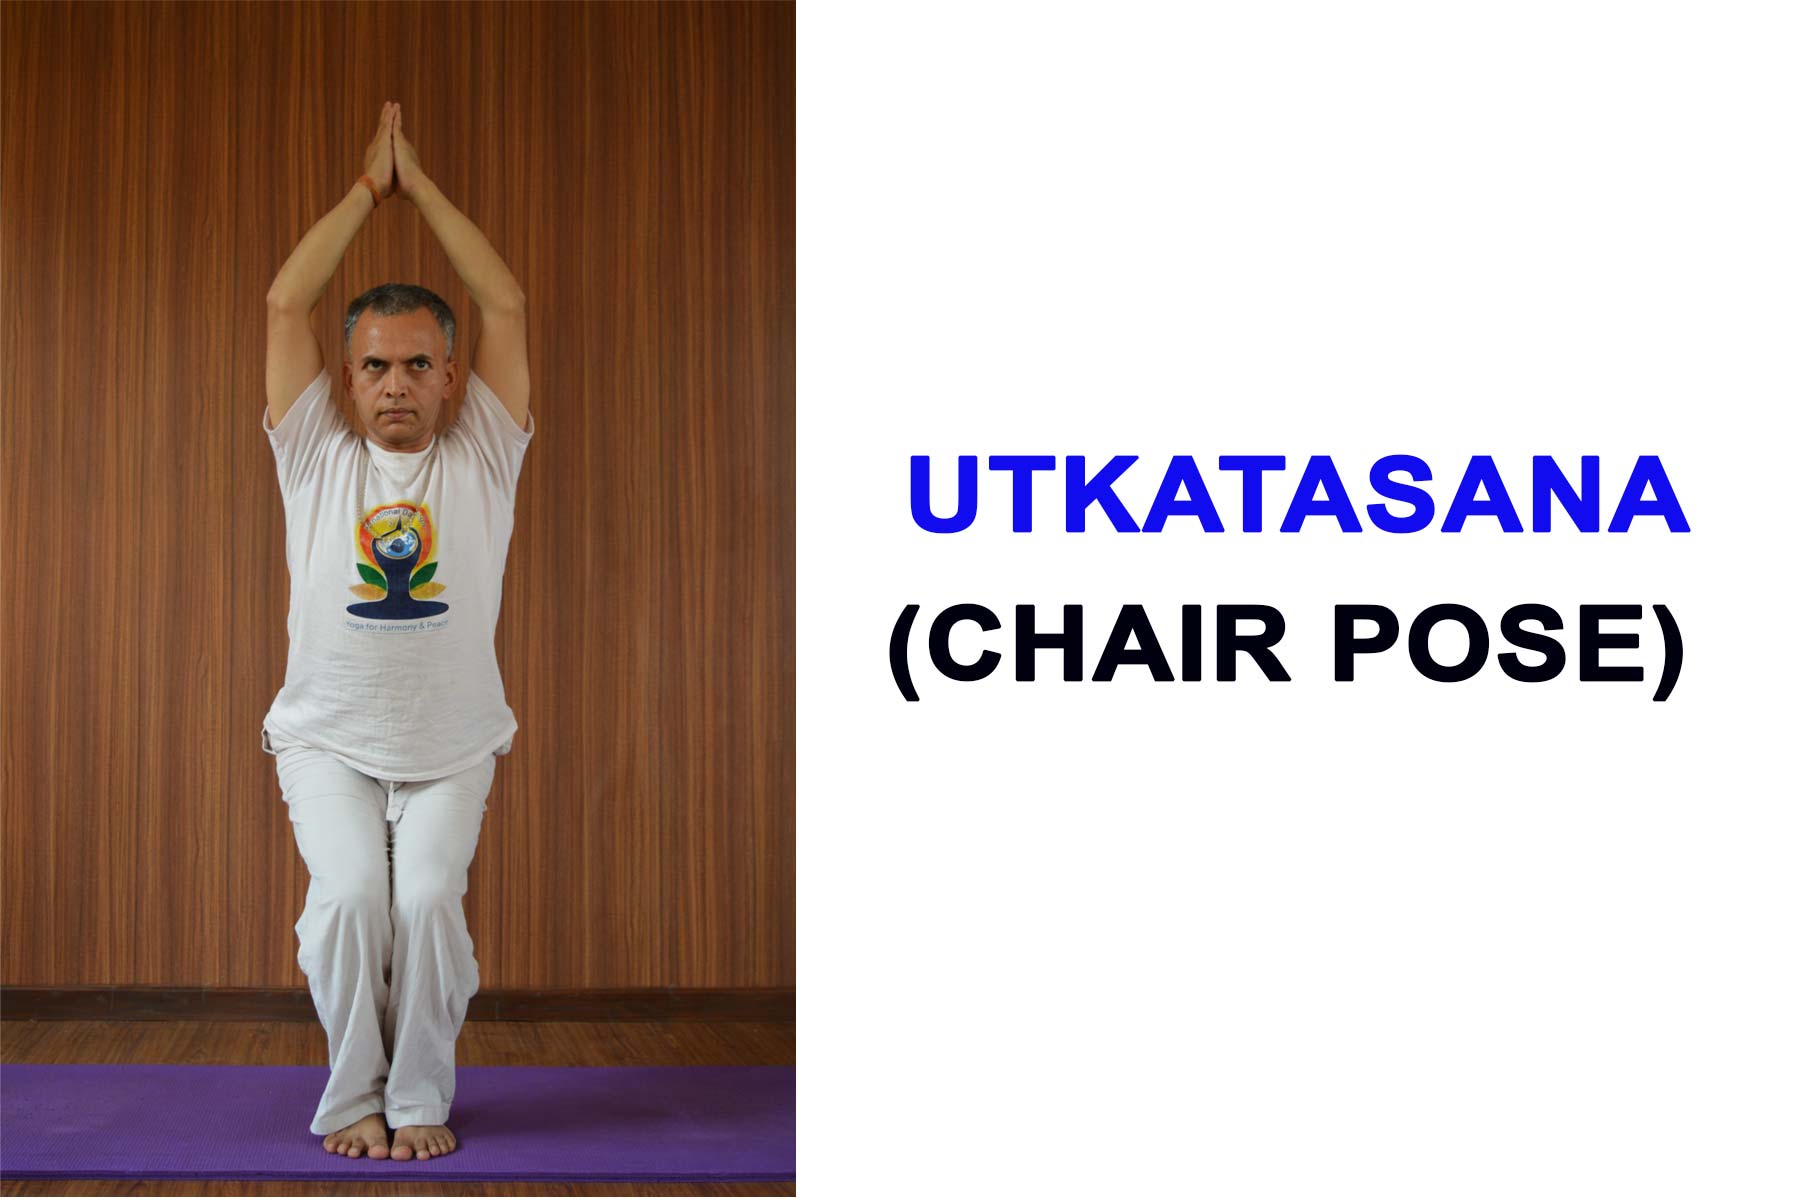
C. Utkatasana (Chair Pose)
Steps
- Stand erect with your feet slightly apart.
- Stretch your hands to the front with palms facing downwards. Do not bend your elbows.
- Bend the knees and gently push your pelvis down as if you are sitting in an imaginary chair.
- Be comfortable and imagine yourself doing activities sitting on a chair to get a better real.
- Ensure that you keep your hands parallel to the ground.
- With awareness, sit straight and lengthen your spine. Relax.
- Sink deeper into the chair by gradually going down but ensure that your knees don’t go beyond your toes.
- Keep going down slowly and then sit down in Sukhasana (cross-legged posture) or lie down on your back and relax.
Utkatasana Benefits
- Helps strengthen the lower back and torso
- Tones the thigh, ankle, leg and knee muscles
- Builds core and improves body balance
Utkatasana Cons
- Avoid if you have chronic knee pain, arthritis, or sprained your ankle
- Don’t practice if you have lower back pain
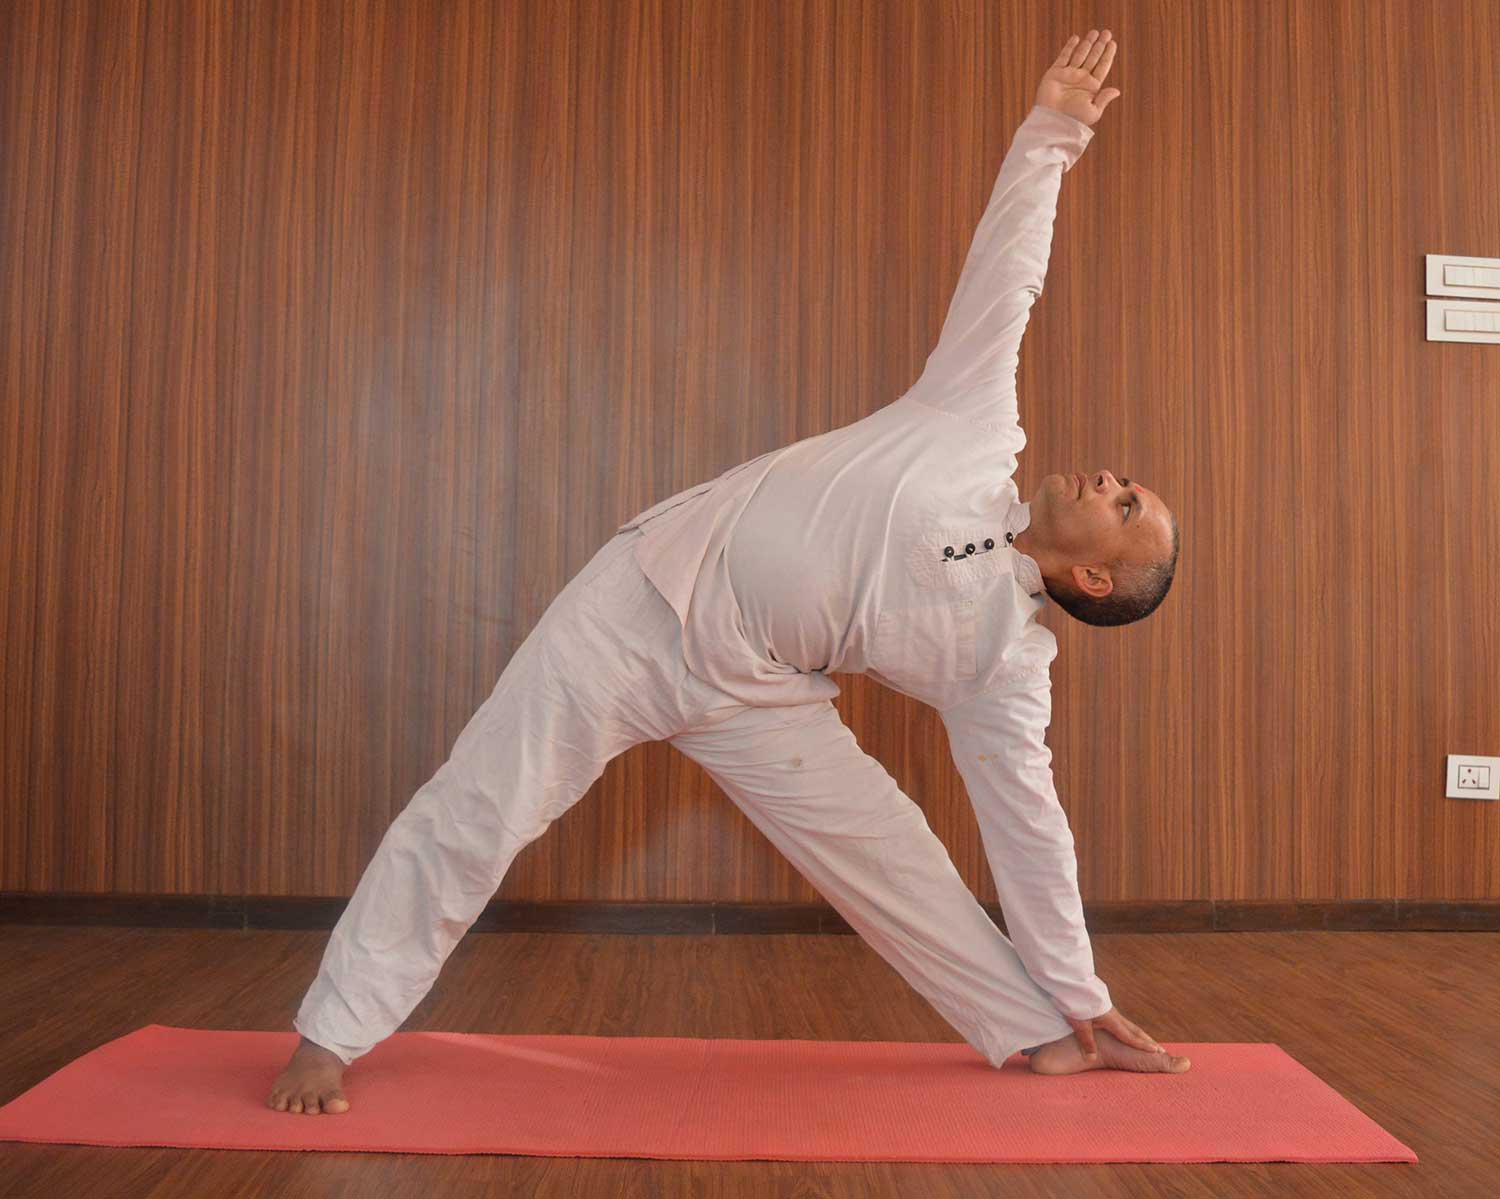
D. Trikonasana (Triangle Pose)
Steps
- Stand straight on the mat with medium stance (about 3 to 4 feet).
- Inhale and stretch your arms at shoulder level.
- Rotate your right foot out 90 degrees and left foot in by 15 degrees and exhale.
- Place your right hand on your right shin bone.
- Raise your left hand upward and gaze at your left thumb.
- Keep taking long, deep breaths.
- Inhale, bend the right knee, and resume the standing position.
- Repeat the same process facing right or using left side.
Trikonasana Benefits
- Opens the chest and promotes deep breathing
- Balance and coordination improves
- Stimulates digestion and relieves stress
Trikonasana Cons
- Incorrect alignment causes strain to the lower back, hamstrings, or neck
- Over-extension is avoided, especially with tight hips or legs
E. Uttanasana (Standing Forward Bend)
Steps
- Place your feet either width apart or together as you stand on the mat.
- Exhale, then bend forward from the hips rather than the waist area.
- Reach your palms or fingertips towards the floor slightly in front of or beside your feet. Knees can be either bent or straight.
- Lift or lengthen the front torso just a little bit after with each inhalation, and with each exhalation, release more fully into the forward bend.
- Hold steadily and evenly breathe for as long as it is comfortable.
- To come out of the pose, bend your knees until your body hit your thighs.
- Then, plant your heels firmly on the ground and softly raise your spine.
- Lastly, raise your head and shoulders.

Uttanasana Benefits
- Stretches hamstrings, calves, and back
- Relieves stress by calming the mind
- Stimulates liver, kidneys, and digestive system
Uttanasana Cons
- Immediate rise can cause dizziness
- May strain lower back if knees are locked or back is rounded
Conclusion
The 5 easiest yoga poses for beginners are simple and best to practice. These yoga poses help in strengthening the backbone, maintain the body posture, and also offer mental clarity. Practicing these easy yoga poses builds a foundation to do yoga in a proper way, creating a way to learn more yoga poses. It motivates you to build confidence and strength to practice more advanced yoga poses with ease.
Written By: Anjali B